Table of Contents
Introduction
(Updated December 5, 2025) If you’ve been in many mobile homes, you’ve probably felt areas of the floor that feel spongy, soft, or even found holes in the subfloor. This is one of the most common issues in older manufactured homes, typically caused by chronic water leaks or long-term breakdown of particle board. Before installing any new flooring, it is critical to fix these spots properly. As an experienced investor and remodeler, I’ve developed a simple, step-by-step process that guarantees a solid, level repair that will prevent squeaks and eliminate future structural problems.
Video Guide Overview
Affiliate Disclosure: This guide contains affiliate links to products used in professional subfloor repair, including the recommended self-leveling compound. If you purchase through these links, Mobile Home Friend may earn a small commission, at no extra cost to you.
I’ve walked many mobile homes as potential flips or investments. Usually, every home more than 10 years old has developed a soft spot or two in the floor. If these are not repaired properly, they will often visually show up in the floor. Even worse is the feeling of sponginess as you walk across them.
The Short Answer
The process of repairing a bad mobile home subfloor is not difficult, but it should be done with care to achieve the desired result:
- Determine the area to be repaired
- Remove the damaged portion of the subfloor
- Attach floor joist supports for subfloor replacement
- Replace subfloor with new material
- Level new subfloor area
- Replace flooring over the repaired subfloor
Let’s look at each of these areas in a bit more detail to get a good understanding of how to do it right the first time.
Financial Breakdown: Cost to Repair Subfloor Damage
The total cost to repair a subfloor depends entirely on the scope (patch vs. full replacement) and whether you pay for professional labor. Never skimp on materials—the labor cost is the same whether you use cheap OSB or quality plywood.
Cost Table: Small Area Repair (DIY)
This covers the common localized repair of 4 to 8 square feet in a high-traffic area like a laundry room, kitchen, or bathroom.
| Material/Tool | Cost Range (Approx.) |
|---|---|
| 5/8” Plywood (1 Sheet) | $35 – $65 |
| 2×4 or 2×6 Lumber (For Sistering) | $20 – $40 |
| Self-Leveling Underlayment (Small Bag) | $25 – $40 |
| Screws, Glue, Shims | $10 – $25 |
| Total Material Cost (DIY) | $90 – $170 |
Professional Labor Estimates
- Small Area (Up to 10 sq ft): $300 – $600 (Total, including materials).
- Full Room (e.g., Laundry/Bath): $600 – $1,200.
- Entire Mobile Home (1,200 sq ft): $3,000 – $5,000 (Labor only, assuming materials are $1,000 – $1,500).
As you noted, a full replacement of an old, weak particle board subfloor often yields the highest long-term ROI for a flip, as the home feels significantly more solid.
Determine The Area To Be Repaired
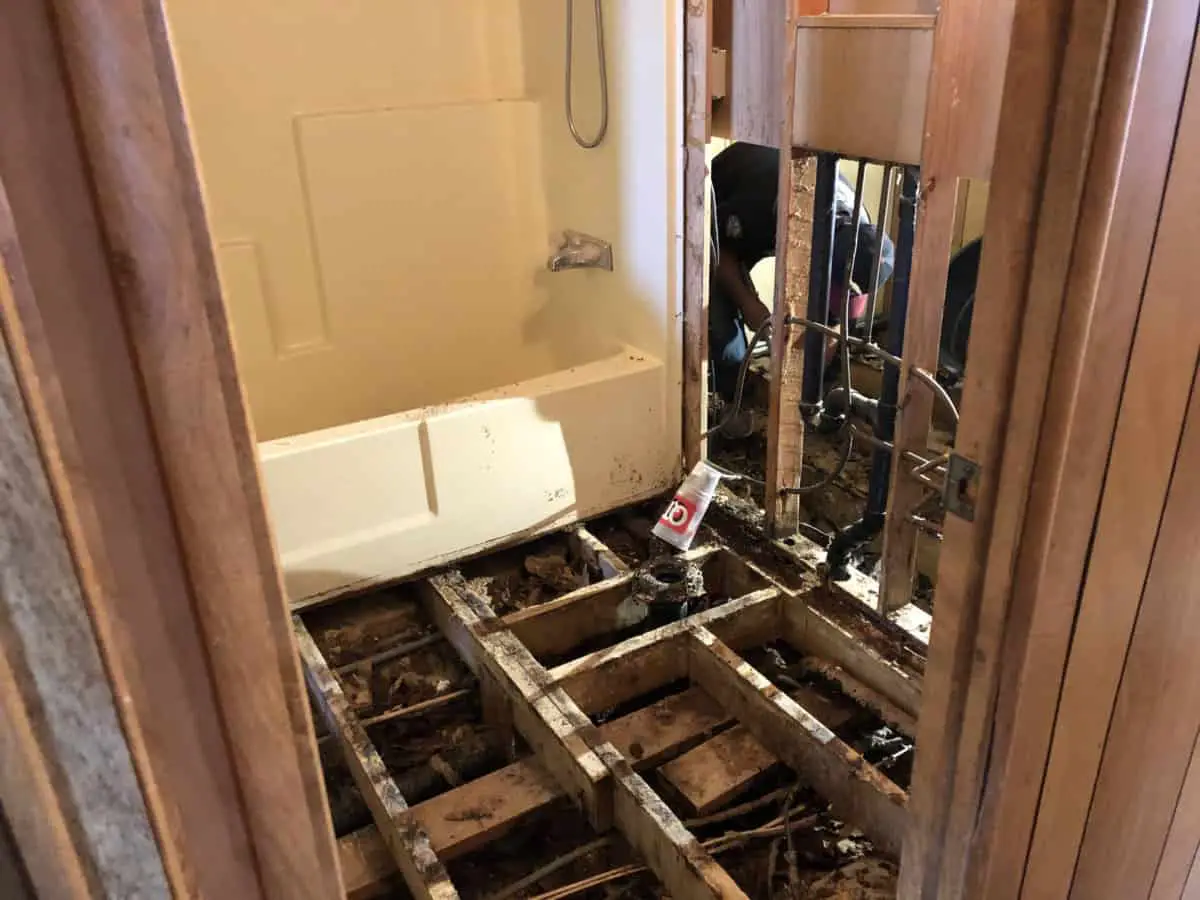
The subfloors of many older manufactured homes tend to be made of dense particle board. Over the years, this type of subfloor has the tendency to break down in heavy traffic areas within the home.
Holes, of course, are obvious. What is less obvious is the breakdown of the subfloor that hasn’t yet caved through. When the subfloor is getting weak, it feels very spongy or soft when you walk on it. If you feel a sponginess, or a soft spot, take tiny baby steps all around the area to get a feeling for how unlevel and spongy the area is.
While soft spots are often subfloor damage, they can also signal a deeper problem: foundation settling. If you suspect the sponginess is widespread or accompanied by bowing walls, consult our complete guide on Mobile Home Foundation Re-Leveling and Repair Costs.
When repairing the floor, you will want to remove the entire area that feels spongy, soft or unlevel.
I have one mobile home that I purchased as a rental about 2 years ago. It was in rough condition, but had renters in place when purchased. When the renter left, I decided to remodel the home and sell it. There were a few holes and a number of soft spots throughout the entire mobile home. The rest of the home had several soft spots throughout.
This home was a 1980 model and had a subfloor made of particle board. Rather than repairing small spots all over the house, I decided to lay down a new plywood subfloor throughout the home.
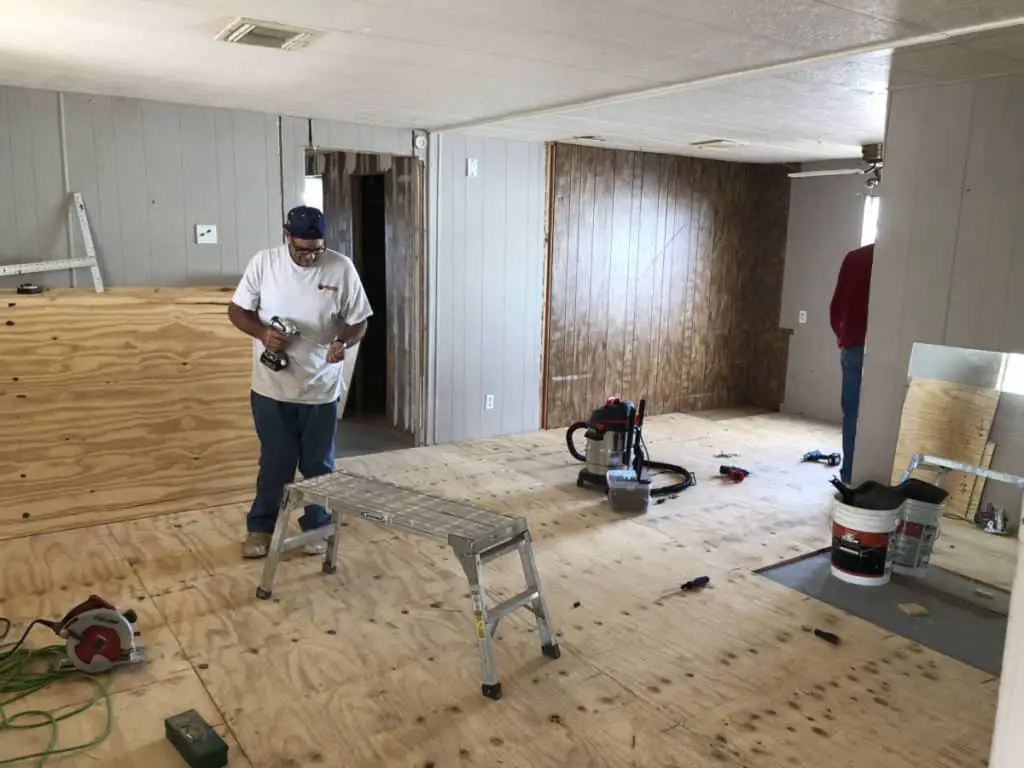
I knew that overall, the finished product would be far more level and feel more solid. The cost to do this throughout the 1,200 sf home was about $1,000 for materials and labor. When we finished, the floor felt very solid throughout.
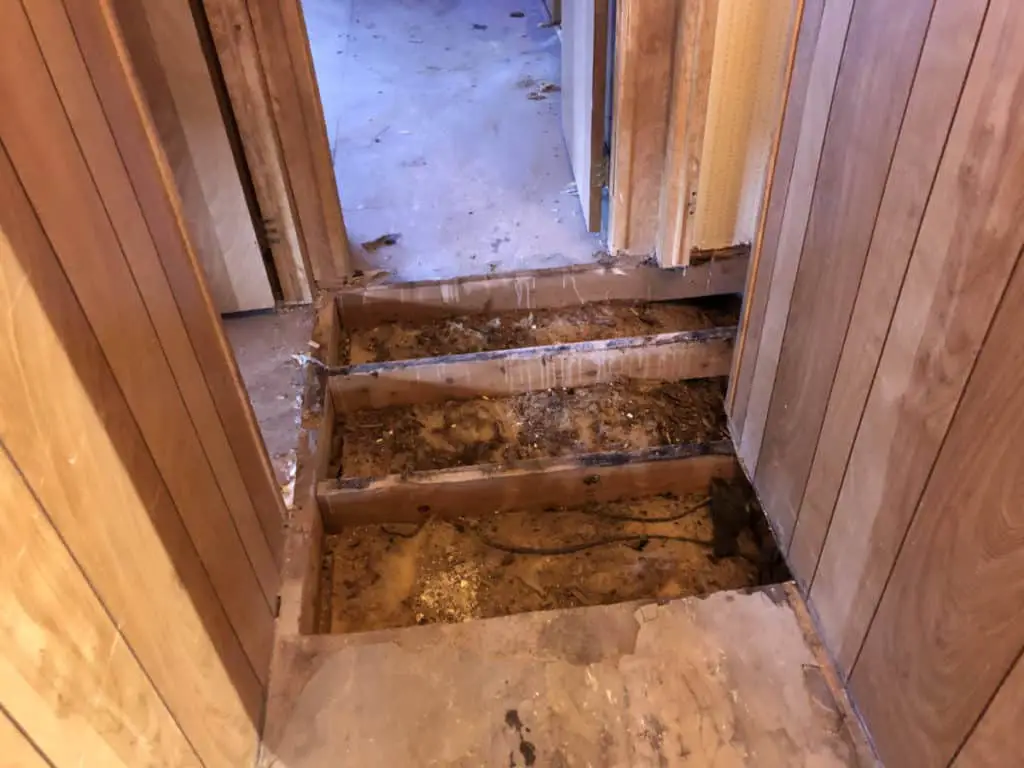
Replacing the entire floor is not usually necessary. In another recent home that we did, there had been a leak in the laundry room and the subfloor was damaged in that room, as well as into the hallway and bathroom.
We removed all of the damaged subfloor material in these areas.

It is always better to err on the side of replacing more floor than necessary.
Remove The Damaged Portion Of The Subfloor
This section is critical. If you proceed with repairs without eliminating the water source, you are wasting time and money. Before cutting the subfloor, trace the water back to its origin. This could be a leaky toilet flange, a failed P-trap, or a window/door seal breach. A soft subfloor is a symptom, not the root problem.
Once the water source is definitively stopped, you can proceed. For a complete strategy on elimination and prevention, see our guide on How to Get Rid of Dampness and Mold in a Mobile Home.
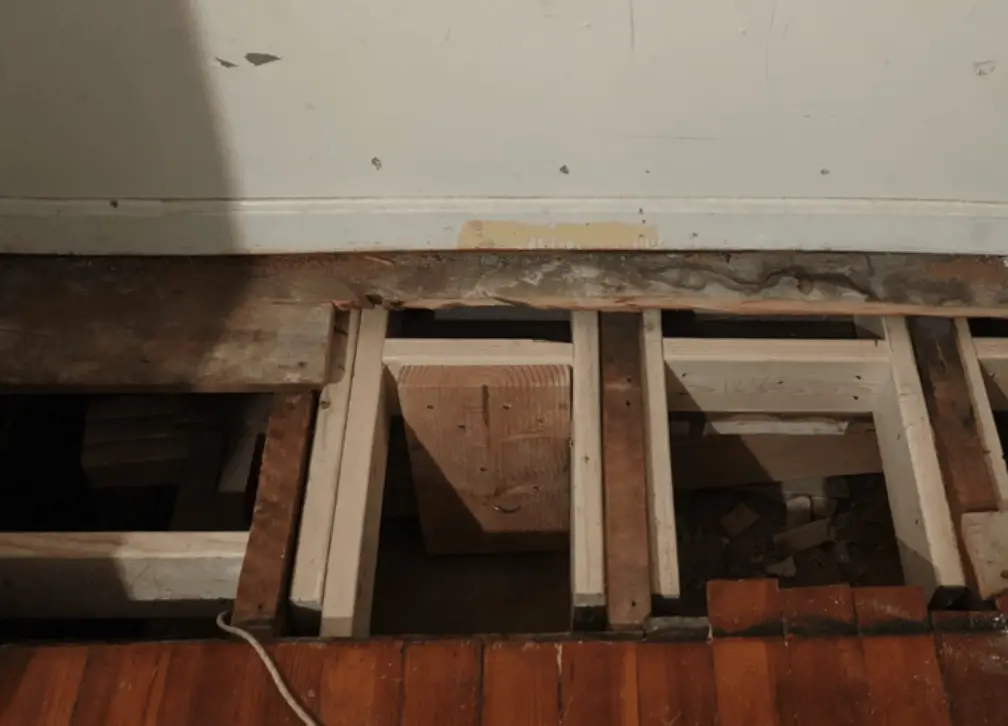
As you can see in the above photos, there are floor joists beneath the floor. When removing the subfloor, you want to make sure that you don’t damage these joists.
The easiest way to begin removing the subfloor, is to use a large hole saw or a jigsaw and cut out from the hole in the floor or a piece of the soft spot in the floor. Once you locate where the joist(s) are, then you can use the saw to cut along the side of the joist.
If you are removing a larger area that covers several joists, the you will want to first cut out the bad areas between each joist, then remove the small piece left on top of the joist(s).
When removing subfloor, remove any part that feels compromised. It doesn’t matter if at the end, the cut out portion isn’t a perfect square or rectangle. We’ll look in the next section how to prepare the joists for supports to support the new subfloor regardless of the shape.
If water damage is the root cause, you must address potential moisture and mold issues first. For a complete strategy on elimination and prevention, see our guide on How to Get Rid of Dampness and Mold in a Mobile Home.
Attach Floor Joist Supports For Subfloor Replacement
Before replacing the subfloor material, the joist support area underneath will need to be modified. It is necessary that all edges of the new subfloor are supported underneath and can be attached with screws.
In order to do this, building a box of sister supports inside of the floor joists will be needed. The supports will also need to go underneath the remaining edges of the existing subfloor so that those edges can also be screwed into the new supports.
Cross supports are needed between the floor joists to support subfloor that has been cut. There are basically 2 ways to do this:
JOIST HANGERS
Two pictures above show building the cross joist support using traditional joist hangers. First, the hanger is secured to the the floor joists. These are screwed into the existing floor joists. Then the cross support is cut to length, dropped into the joist hangers, and finally attached to the hangers using screws.
Where the installation of this type of support can be difficult, is that the cross support must be located so that 1/2 of the edge is under the old subfloor and the other 1/2 will be under the new subfloor to be installed. Getting the cross support to drop down into the hangers can be tricky because of the existing subfloor that is still on the joist. I prefer to use the sistering joist method, as it is easier to install.
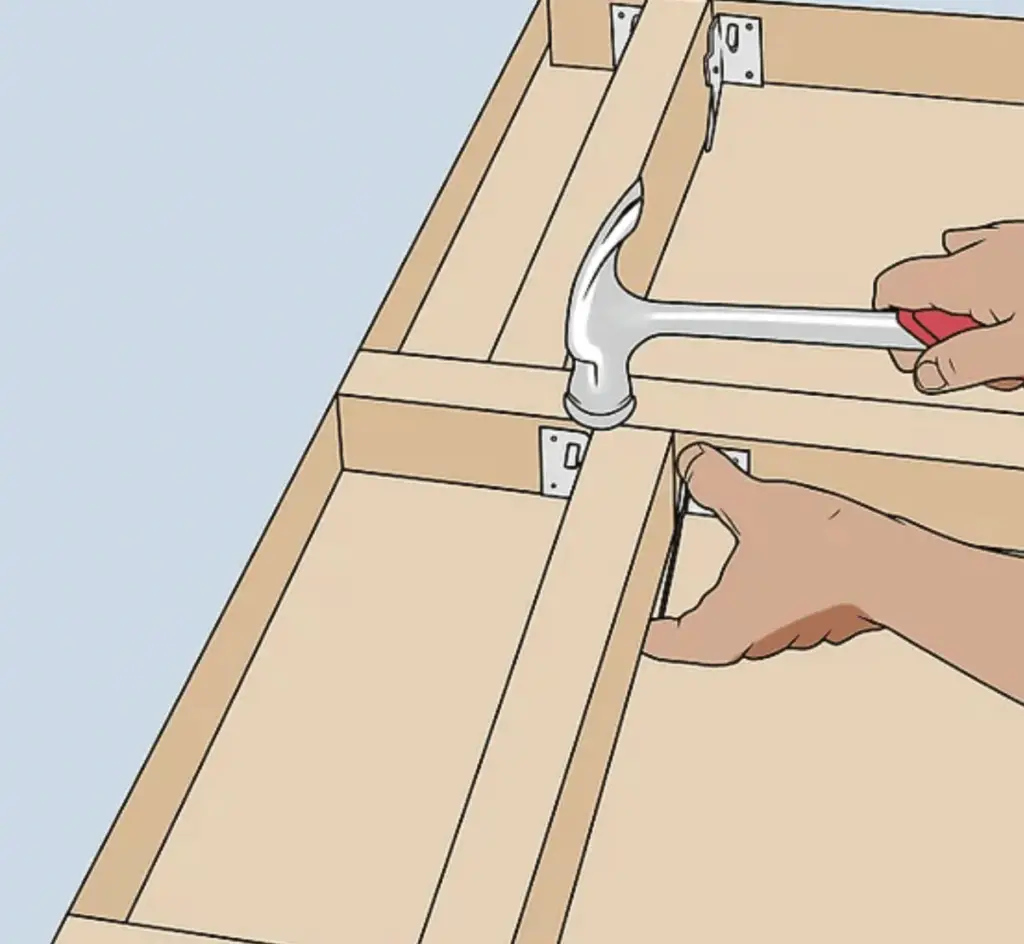
SISTER SUPPORT BOX
Using this method is generally easier to install the cross support 1/2 under the existing subfloor. See the above picture.
Create an “H” from 2 x 4 lumber. The sides of the H will each screw into the existing floor joists. The cross of the “H” will form the new cross support that will be located 1/2 under the existing subfloor and the other 1/2 will be exposed so that the new subfloor edge can be installed over the top. When it is done this way, the edges of both the old subfloor and the new subfloor can be secured properly to the new cross support in the floor.
The “H” will be built before installing into the floor. The cross support of the “H” will be securely screwed into the sides of the “H” before installing the “H” into the floor.
After building the “H”, it is lowered into the floor. The sides of the “H” are then nailed and screwed into the floor joists. Remember, the cross support of the “H” must be 1/2 under the edge of the existing subfloor so that the edge of the subfloor can be screwed into the new cross support.
Replace Missing Subfloor Section With New Material
Once any needed supports for the floor joists are in place, it is time to replace the actual subfloor. Although the subfloor for many manufactured homes is made from pressed board, we like to use a quality plywood for the replacement material.
The important thing about choosing the new material is to make absolutely sure that it is of the same thickness as the original subfloor. This will make the leveling process far easier.
When cutting the plywood for the replacement areas, make sure to take careful measurements and try to get the fit as tight as possible.
- Step 1 – Screw existing subfloor material to new supports.
- Secure all of the original existing subfloor to the new supports with glue and screws. (This will prevent any squeaks at the seams.)
- Step 2 – Carefully measure the size to cut the new subfloor plywood.
- Step 3 – Lay new plywood subfloor into place.
- Step 4 – Secure new subfloor into place with screws along each edge and joist.
Level New Subfloor Area
The “level sensors” in your feet will pick up very easily on any uneven areas in your new floor. If the new subfloor is not leveled before installing your new flooring material above it, you’ll be able to feel humps and dips with your feet after the flooring is installed.
The “level sensors” in your feet will pick up very easily on any uneven areas in your new floor. To take care of this problem, we have found that specialized compounds work perfectly for our purposes: we highly recommend using this Self-Leveling Underlayment. Just mix it with water, pour, and spread. Taking the time for this step makes the finished product of your new subfloor area feel solid and level underneath your feet.
“The Henry Level Pro 40 lb. Self-Leveling Underlayment is an easy-to-use, cement-based underlayment that self-levels. Just mix it with water, pour and spread. The underlayment is excellent for smoothing and flattening interior surfaces before installing floor coverings. Use over concrete, wood, tile, terrazzo and cut back adhesive.”
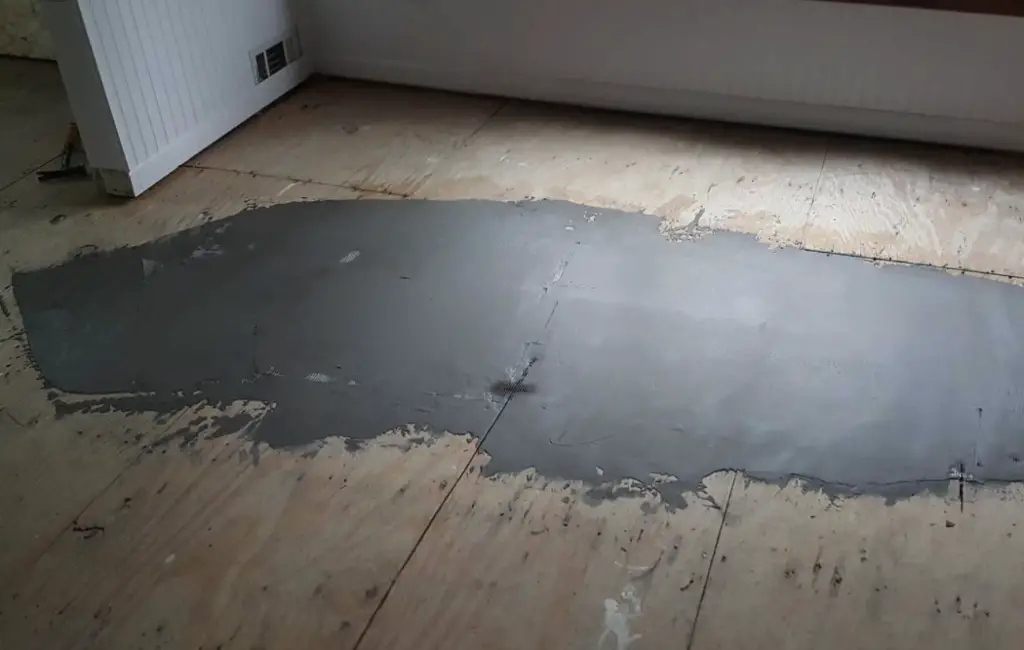
Taking the time for this step makes the finished product of your new subfloor area feel the way it should underneath your feet.
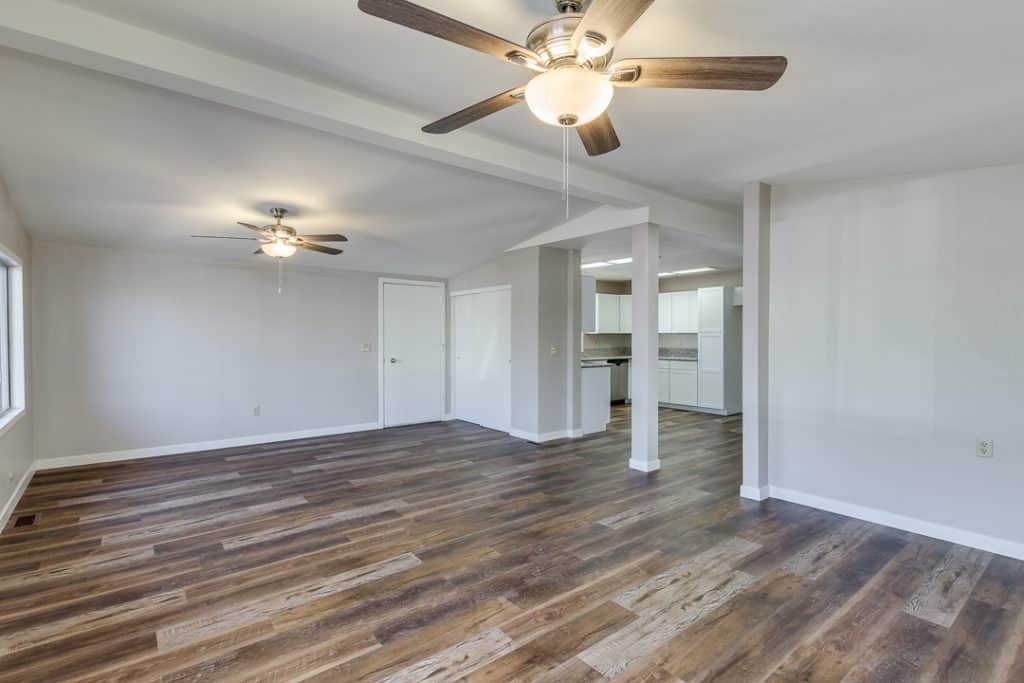
Replace Flooring Over The Repaired Subfloor
The final step is to replace the flooring over the repaired area. You may have just pulled up carpet and repaired the floor underneath. If so, then relaying the carpet is an easy task.
Often, when repairing a bad subfloor, it is when you are going to install new flooring, whether tile, wood, or carpet.
When a damaged subfloor is properly repaired, your new flooring should feel and look beautiful for many years to come. Not having any low spots or soft spots in your new floor makes your home feel solid and of better construction.
Related Questions
DO MOBILE HOME ROOF COATINGS REALLY WORK?
No matter where you live, it rains! Sometimes a lot, sometimes very little, but when it does rain, you want your mobile home roof to be watertight. Also, summers tend to be hot, humid and can generally heat up the roof to be hot enough to cook pancakes. Can popular roof coatings work to keep the water out and the heat off?
Roof coatings are like a rubberized glue that gets “rolled on” the roof like paint. It helps seal cracks to keep out water leaks, and it’s also generally white, which reflects the heat off of the roof. It is one of the greatest and least expensive ways to extend the life of your roof; keeping your home dry and cooler.
HOW CAN I GET RID OF DAMPNESS AND MOLD IN MY MOBILE HOME?
Remember the old saying “an ounce of prevention is worth a pound of cure”? That is absolutely the case when it comes to getting rid of dampness and mold inside of a mobile home.
Water and humidity in any home, site-built, modular, or manufactured can cause problems for any homeowner. In fact, water remediation (restoration) is a $210 BILLION dollar business in the United States. In case you’re wondering, that is A LOT!
When water gets trapped in spaces such as attics, walls, crawl spaces, carpets, wood subfloors, etc. mold can develop. Mold is a common health hazard and causes all types of respiratory issues.
Most folks think that water damage inside of a home comes either from leaking plumbing or a leaky roof. While those are both true, that is only the beginning. Sealing out moisture, whether from the roof, windows, doors, floor, skirting or ground is necessary to prevent buildup of dampness and mold. Keeping the moisture away to begin with is the ultimate weapon against buildup of dampness and mold.
Written by a real estate investor who has successfully renovated over 100 properties, specializing in structural repairs and subfloor replacement for manufactured homes to ensure long-term stability.