
Table of Contents
Introduction
(Updated December 3, 2025) Newer manufactured homes are looking better than ever before. In the last few years, I’ve been in some that look and feel like a traditional stick-built home. However, by the time you select upgrades, purchase the land, and pay for the setup, the cost can often approach the price of a site-built home. The strategic and often more profitable option is to buy an older manufactured home already on a desirable site and remodel it to look new again. How difficult and expensive is this? Not as much as you think. As an investor, I break down the entire process—from purchase price negotiation to final granite installation—using a real project example to show you how to execute a remodel that generates significant profit and provides beautiful, affordable housing.
Video Guide Overview
Newer manufactured homes are looking better than ever before. In the last few years I’ve been in some that look and feel like a traditional stick-built home. But, these homes are not inexpensive. By the time you option one out, purchase it, and pay for it to be set up on your site, the cost can escalate pretty quickly.
There is an option! Buy an older manufactured home that is already set up on the site you desire, then remodel it to look like new again. How difficult and expensive is this? Not as much as you think. We recently did just that with a home in a nice family manufactured home park. Let’s go and see how it turned out!
The Short Answer
- Find a good older home
- Make the purchase
- Know the end from the beginning
- Make the game plan for the remodel
- Executing the remodel plan
- Related Questions
Find A Good Older Home
Finding the right home to work with is paramount to having success with your project. Whether you plan to live in the home when you’re finished, or you plan to sell it for a profit, finding the right house in the right area matters a lot.
The Right Park
In our business, we look for homes in areas that we know will be desirable to a buyer looking to live in the home. We buy both manufactured homes in parks, and homes on fee simple lots (their own land). When we are doing a project in a park, the desirability of that park makes a great deal of difference to us. If the park isn’t a good park, we won’t take on the project, regardless of how good of deal we can make on the home.
A few questions to ask yourself about the park:
- Is it a family all ages park or a 55+ senior park?
- Are the majority of the homes in the park well kept?
- Are the streets and common areas of the park well maintained?
- Are the streets littered with cars?
- Would you want to live in the park yourself?
The answer to the last question makes a great deal of difference to me. Even though I’m never planning on living in one of our project homes, if I would not be willing to live in that home, and in a park like that, I’ll probably pass on the project. I want to make sure that my proje t will have appeal to others. Maybe it helps that when I was young and first married, we purchased and lived in a mobile home in a park. I have first-hand experience with mobile home living! But, this is my ultimate litmus test!
For this project, there is a park that we have worked in extensively. At one time it was a senior 55+ park, but was turned into a family park many years ago. The park is full, and most of the homes date from the 1980s and early 1990s. Overall, for a family park, it is well-kept and the homes are in mostly good condition. On a scale of 1 to 5 I’d rate the park a 3.5. A solid and stable location for a remodel project.
Is The House Structurally Sound?
We have found that one of the most expensive repairs on a manufactured home often tends to be the roof. If the roof has leaked in the past, often the drywall or acoustical panels in the ceiling may be sagging. With a bad roof, water may have also gotten into the walls, and even the floor. Drywall is usually an inexpensive fix, but finding and replacing matching older acoustical panels can be a challenge. Replacing the asphalt shingles on the roof of a manufactured home can cost anywhere from $2,500 to $6,000 depending on the size of the home.
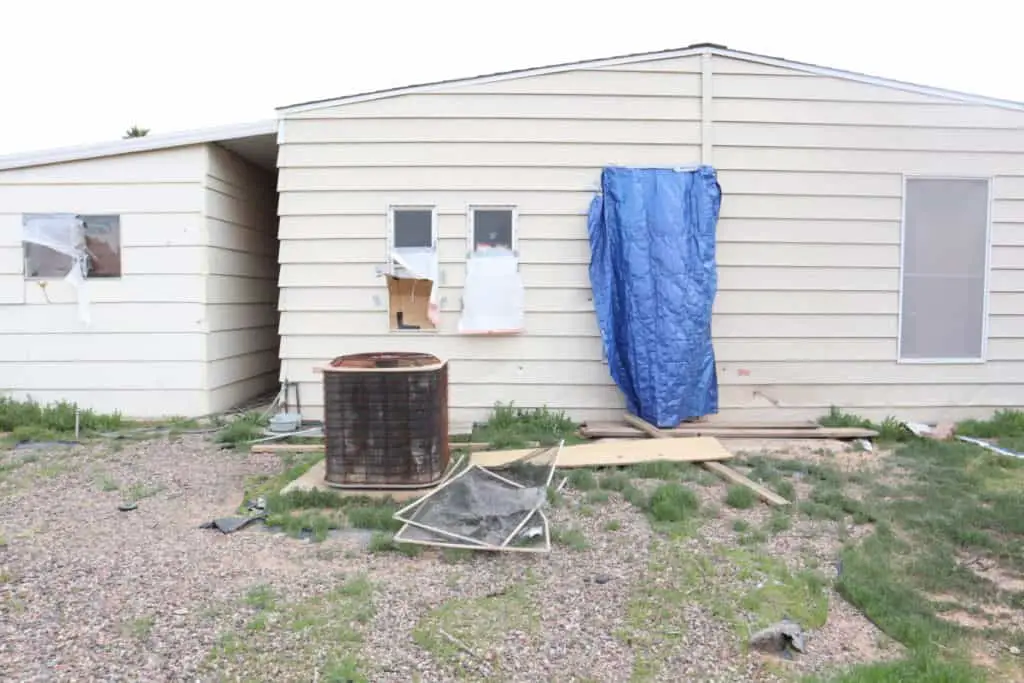
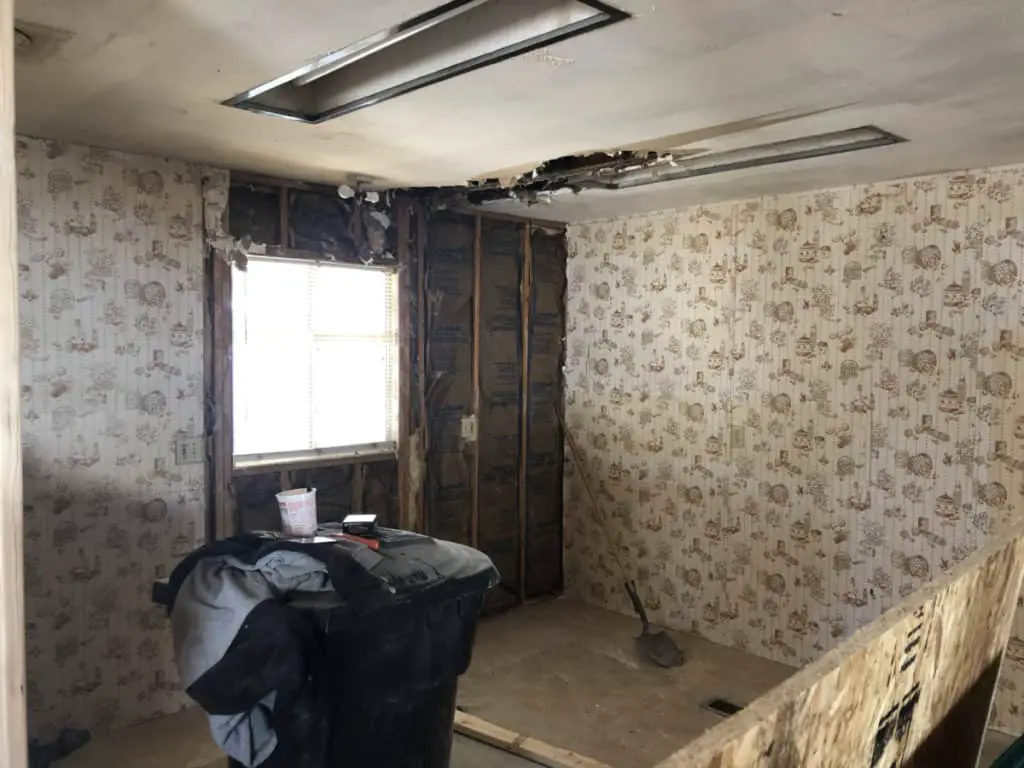
Our project home is a 1983 24 x 56. It still had the original shingles on the roof, but there was only one small roof leak on the edge above the kitchen window, and it wasn’t a result of the shingles, but the flashing on the side.
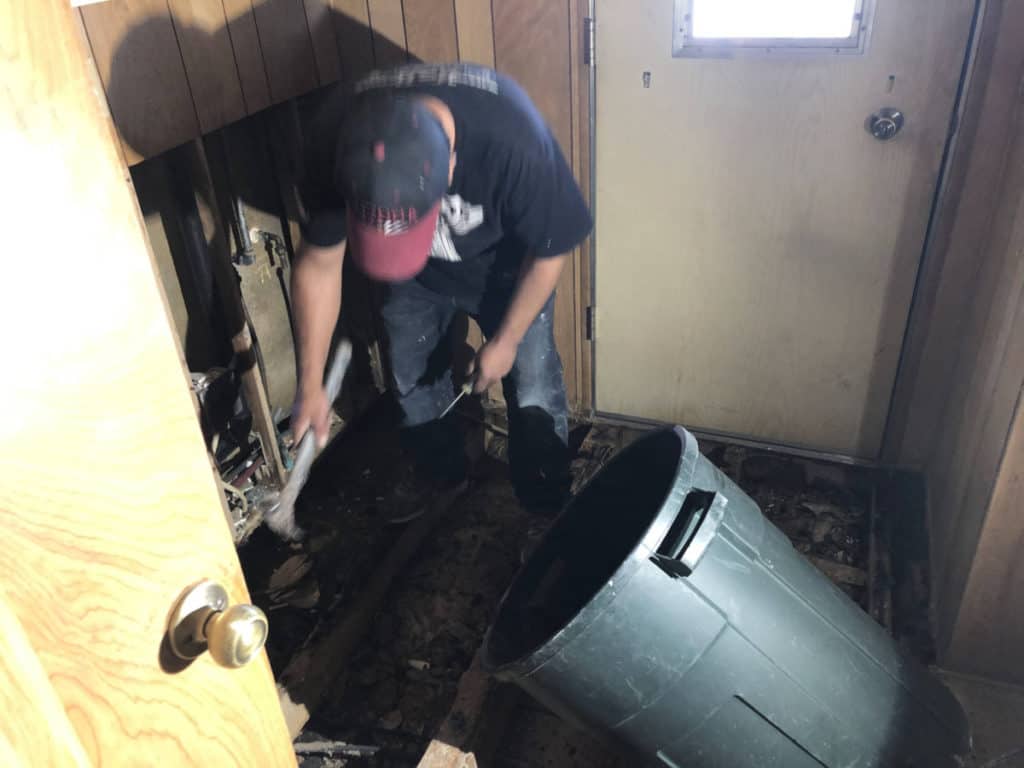
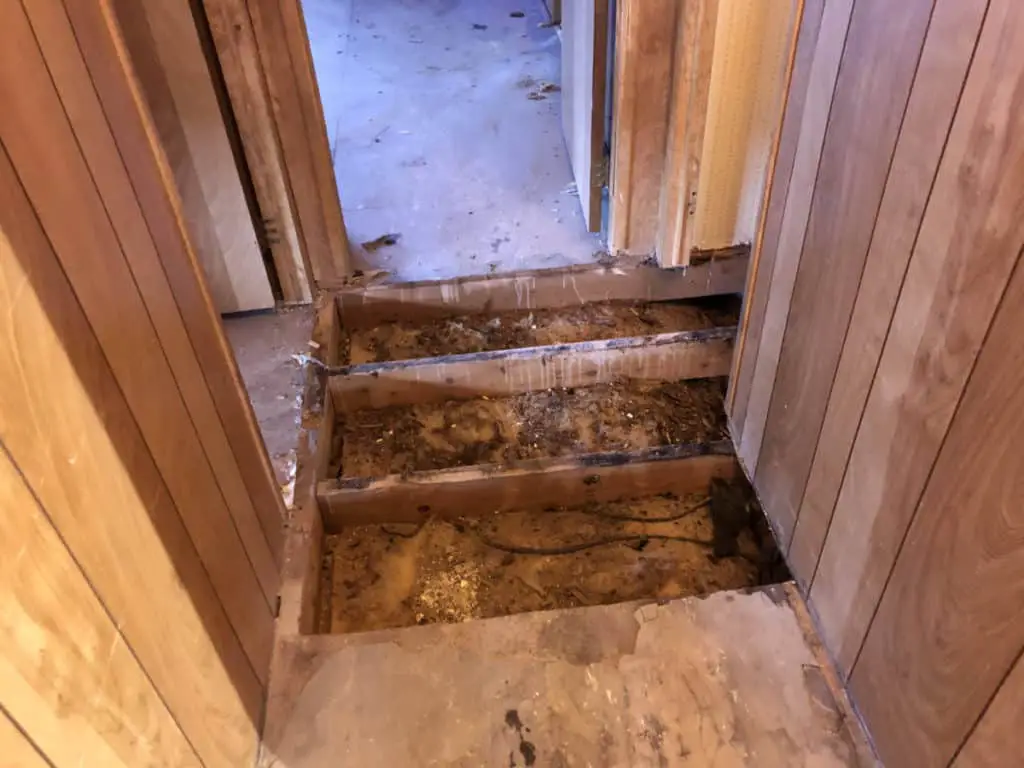
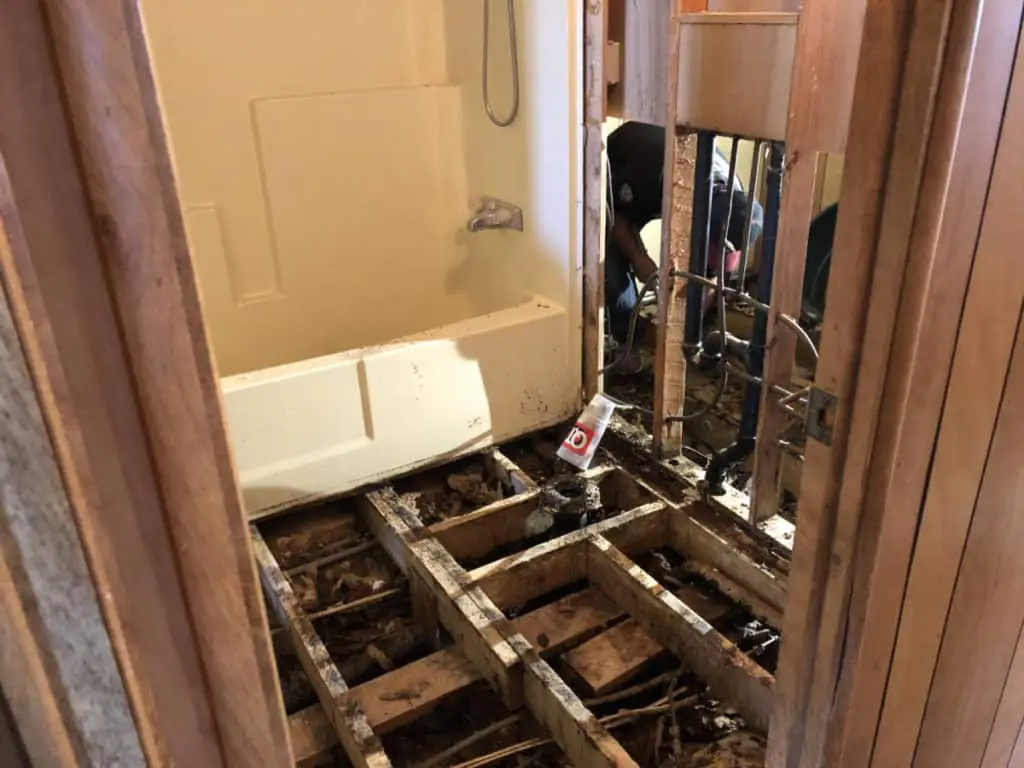
Of equal importance to the roof, is the structural integrity of the subfloor. Often in older, manufactured homes, the subfloor may have soft spots or holes. Holes in the subfloor, of course, must be fixed, but it is also not a good feeling to walk across the floor, bouncing as you go, because the floor is spongy.
Floors are not nearly as expensive to repair as a roof, but they do require work. Often, if the floor is bad in a spot, we can just spot repair. If we have sponginess throughout the home, we’ll overlay with a new subfloor. This can cost a couple of thousand dollars if done correctly.
We also look closely at windows, cabinets, and the HVAC system. While these are not structural, they can all be quite expensive to replace. When making the decision to buy any particular home to remodel, we find it super important to know what we’ll be able to get for the home once it is remodeled. This is known as the ARV (after repair value).
Make The Purchase
It is a common phrase that you make money on a flip when you purchase the property. This is true as well for mobile homes. No matter the potential of the home, if you pay too much for it to begin with, you’ll likely lose money.
We find it important to be fair to all parties to the transaction. We like to share with the owners of the homes that we buy what we plan to do to the house, and how much it will cost us to do it.
Often, owners of these homes often believe that they are worth far more than we can offer. But, we’ve been pleasantly surprised in many scenarios after we share the plans for the remodel. The owners know what work needs to be done. They also know that we are purchasing the home to make a profit. We will often let them look at the portfolios of the homes that we’ve done in the past, so that they know we do what we say we will.
When they start to see the amount of money involved with the repairs, they will often change their mind as to how they feel about our offer. We always tell them that if they feel they can do better by selling to someone else, then by all means do it.
Depending on the ability of the owner, both financially, and ability to do the work, they will often sell to us for what we can offer.
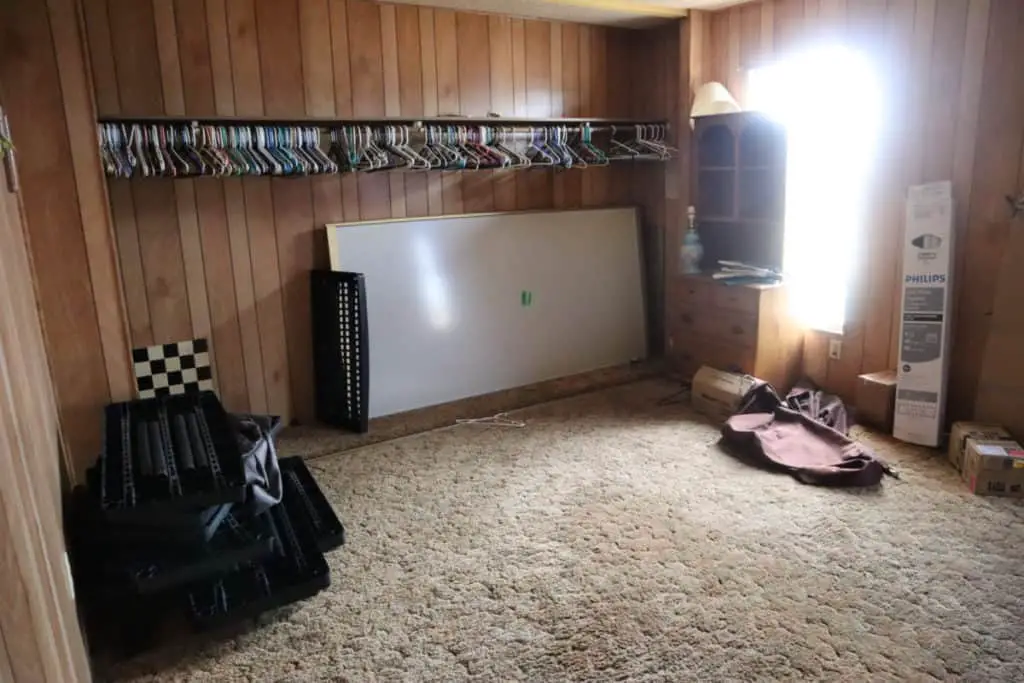
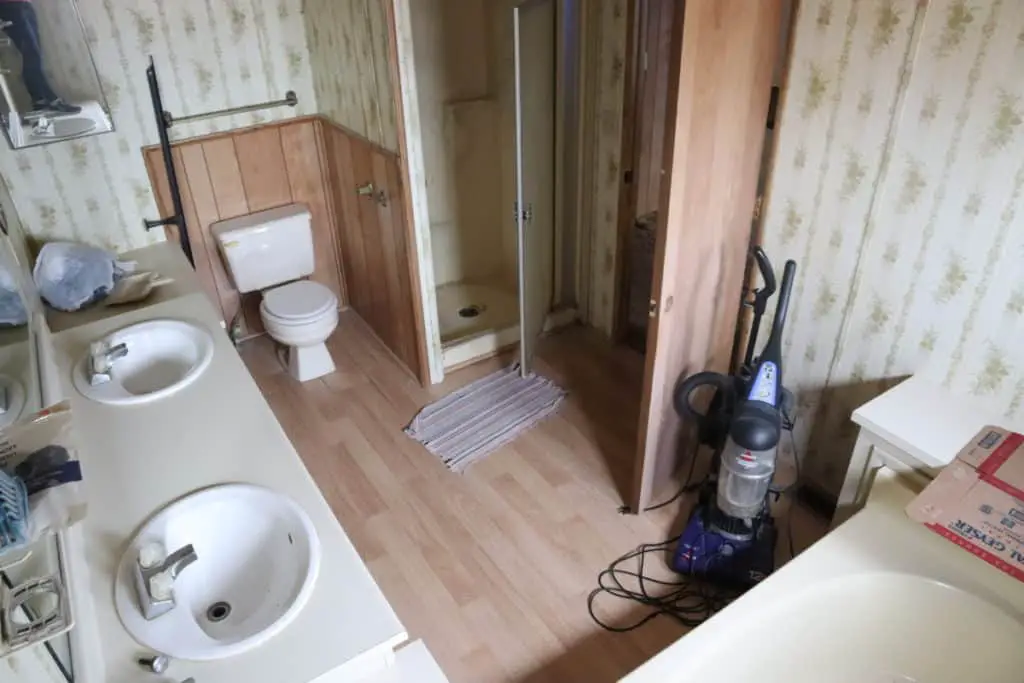
In the case of the home in this post, it was a 1983 2 bedroom, 2 bath home with original everything except carpeting. The home also had significant floor damage in the laundry room and one bathroom where the washer had flooded. There were also 4 broken windows, and an inoperable HVAC system.
We have remodeled a number of homes in this park, and we calculated that the ARV (after repair value) of the home would be about $45,000 when finished. We like to try and get a $20,000 profit, to make the remodel worth the risk we are taking. We also figured that it would take us at least $20,000 in cost to repair the home. We offered the homeowner $4,000 for the home. They accepted without thinking twice.
Was this a good deal for us? We were about to find out. Doing a remodel is like peeling the layers of an onion, the more you peel back, the more you often find additional issues or damage.
Know The End From The Beginning
How can anyone possibly know the end from the beginning? Good question! Maybe it would be better said to carefully plan the end from the beginning.
Even if you plan on living in the home when it is finished, you want to make sure that you’ll have a home where you’re not upside down financially; meaning that you have more invested in the home than it is worth.
This is why it is so important to know what after repair values (ARV) are in the area for the type of home you want to buy. As real estate professionals, we have the ability to quickly take a look on the MLS to make comparisons to other like homes.
Make A Preliminary Plan Before Starting Anything
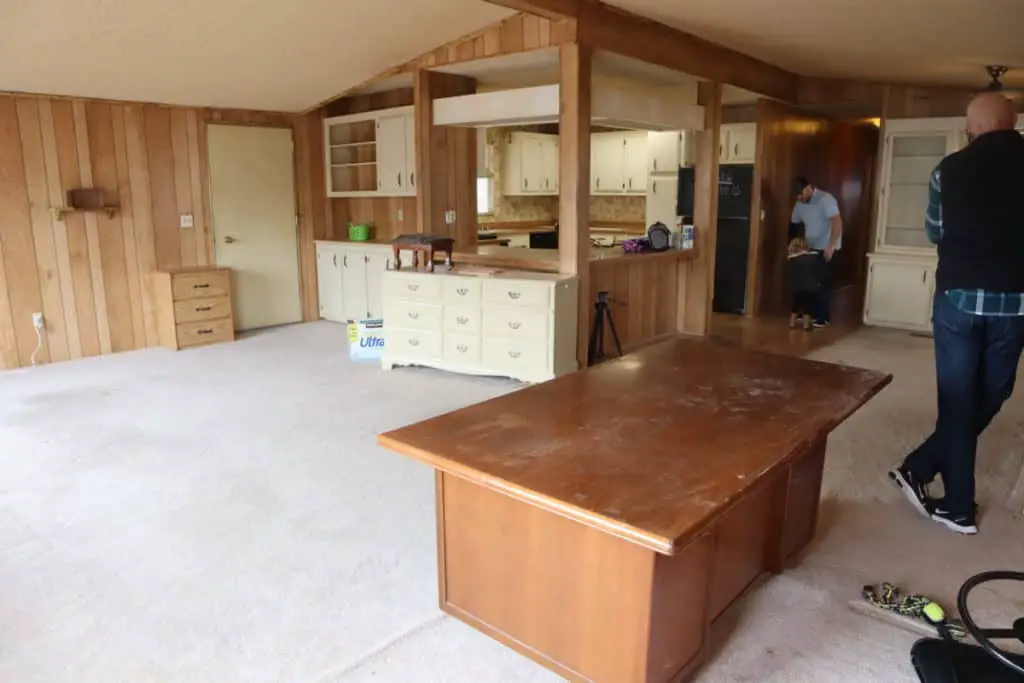
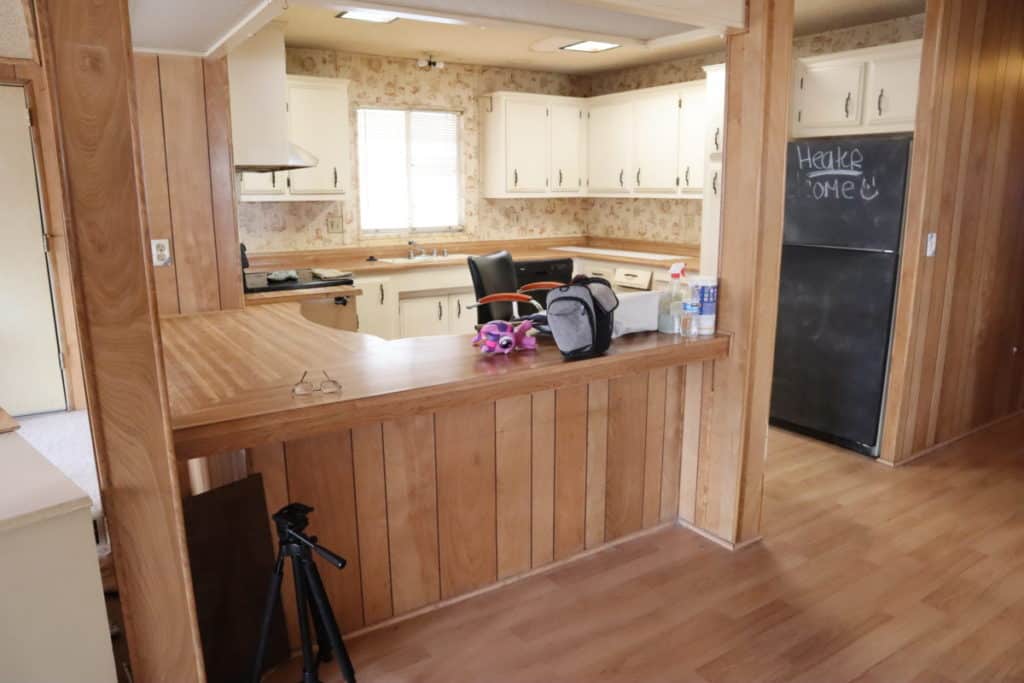
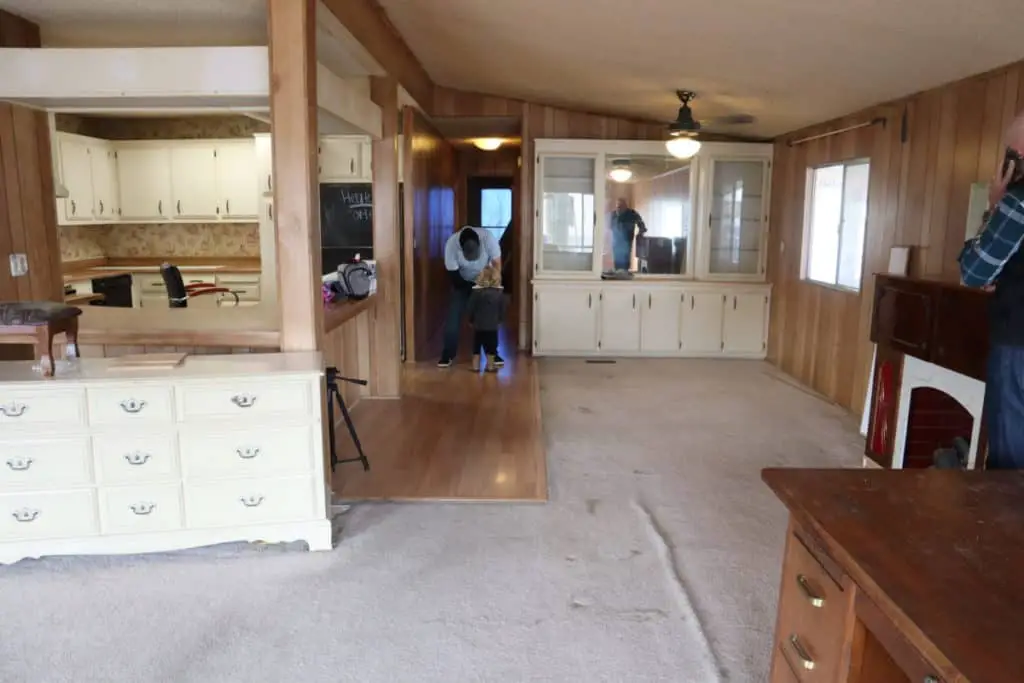
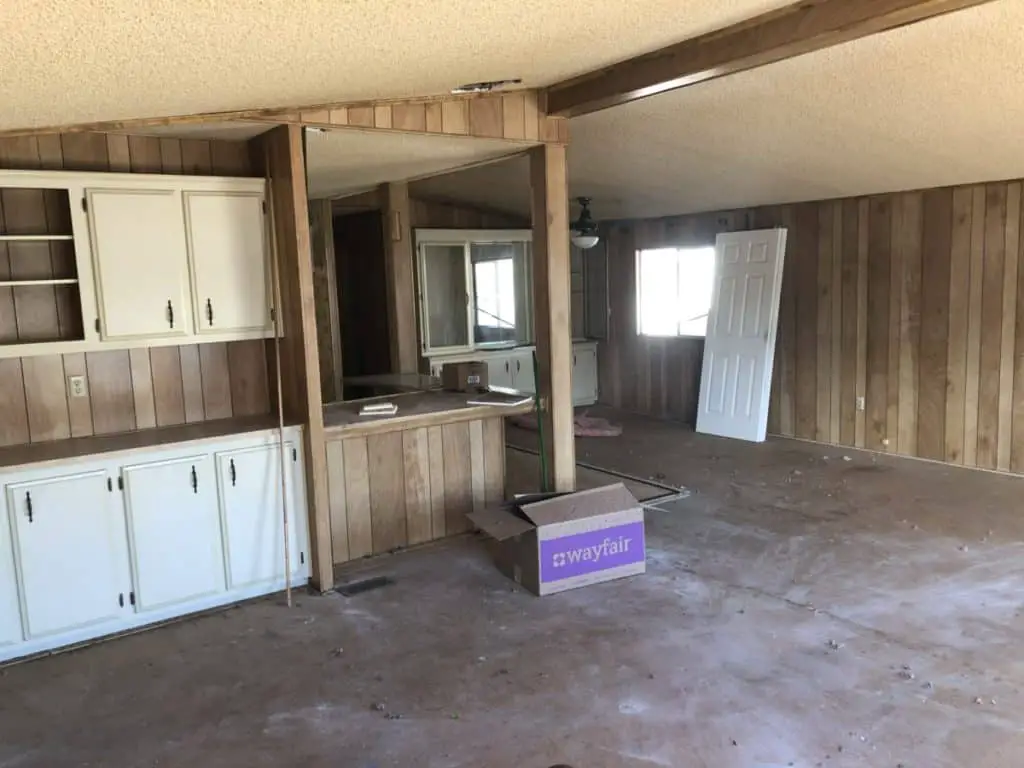
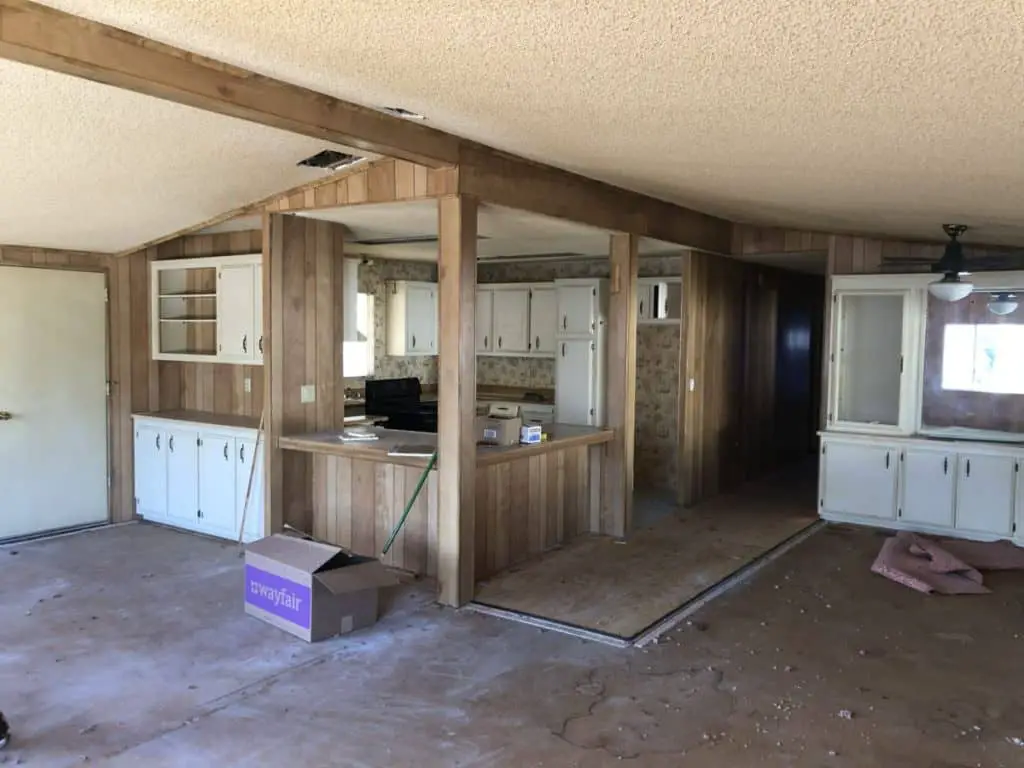
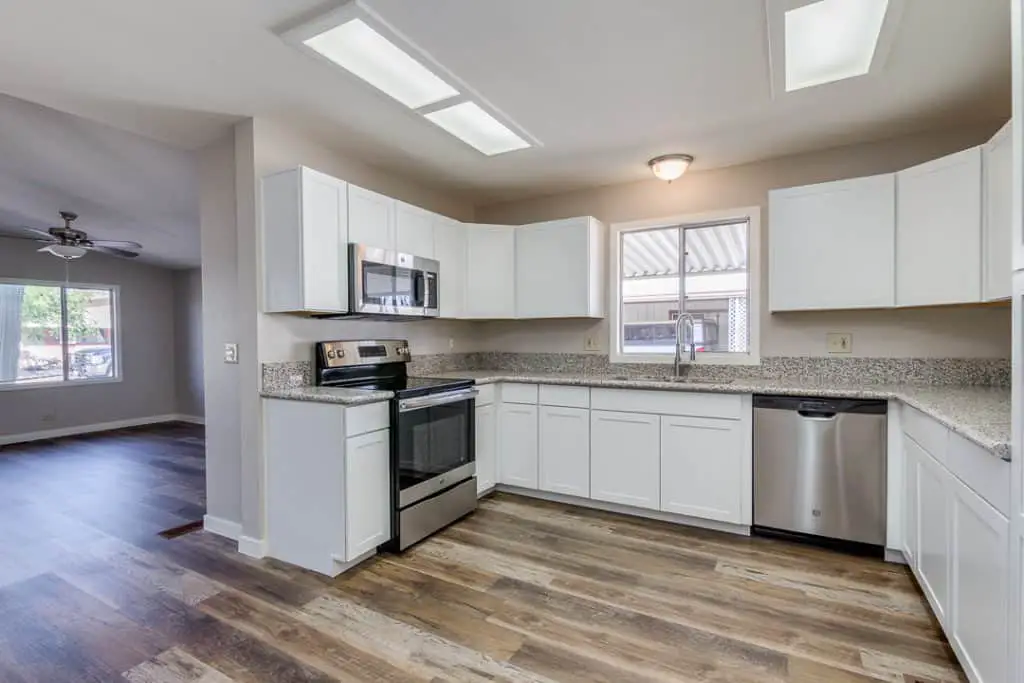
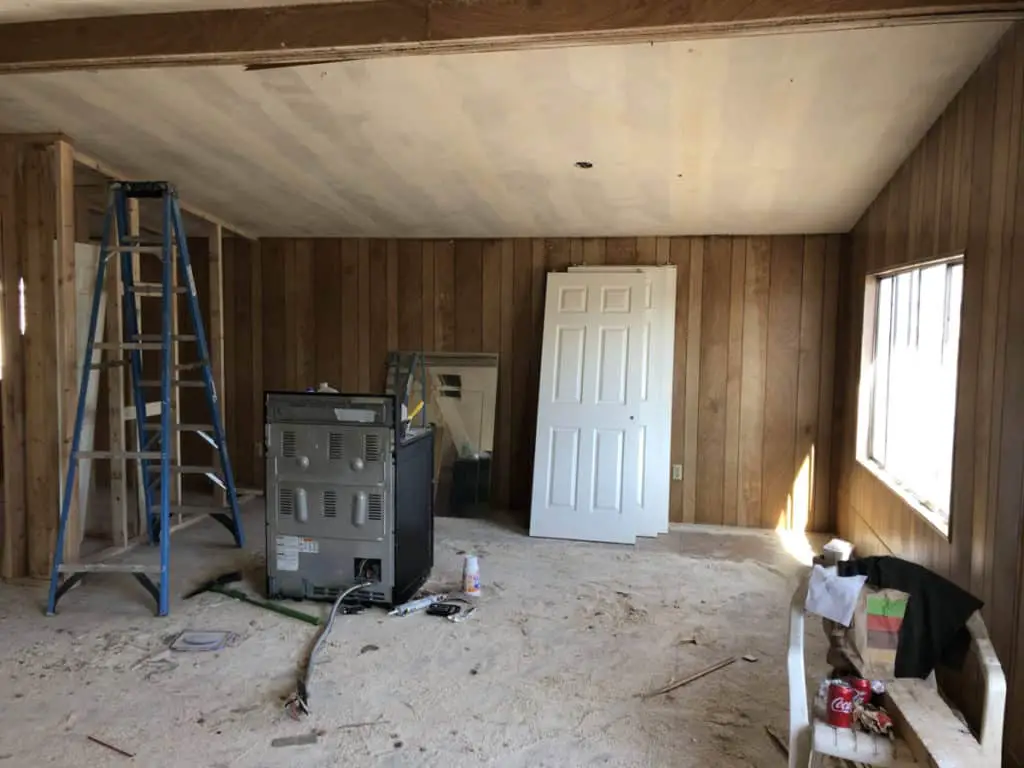
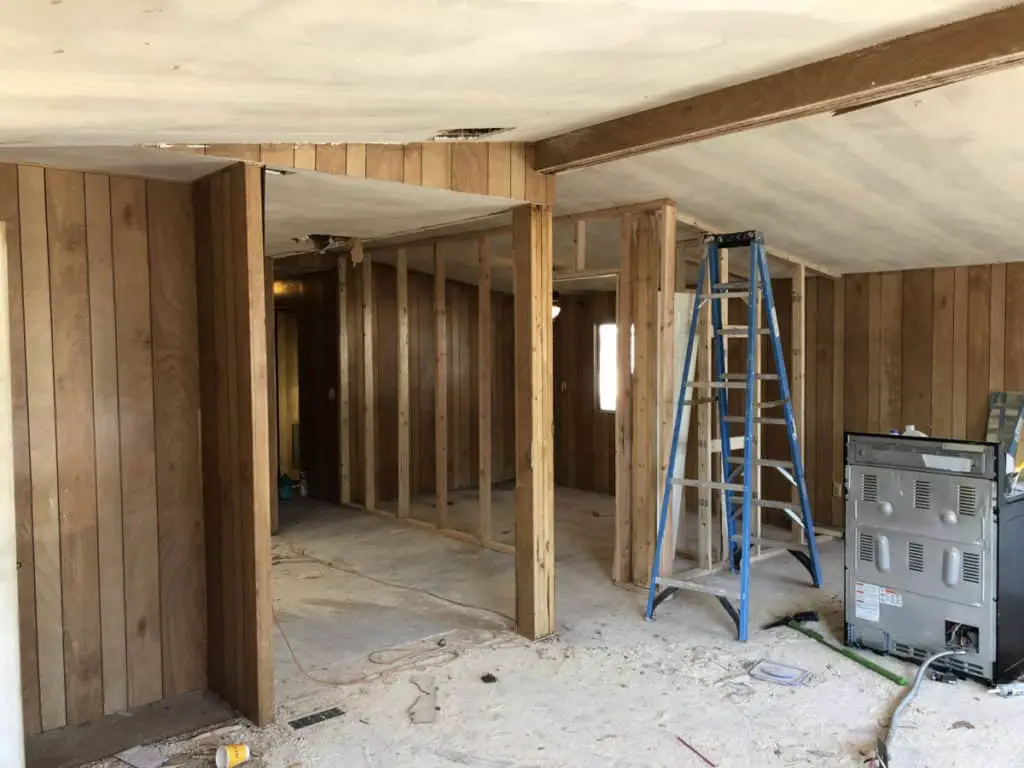
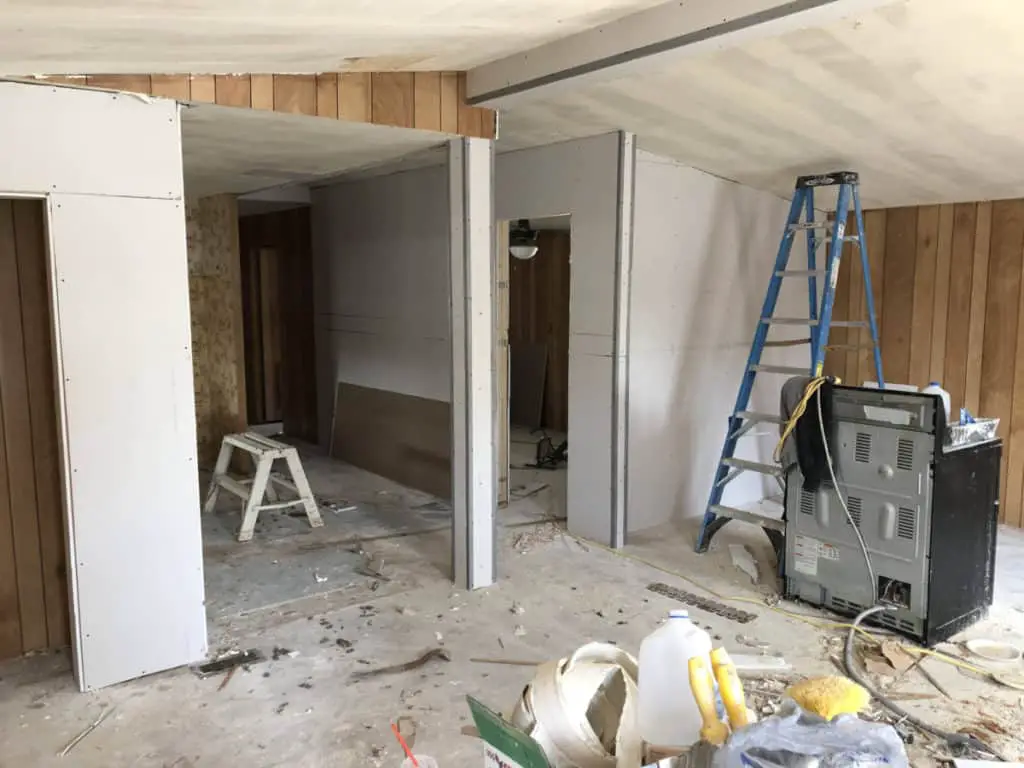
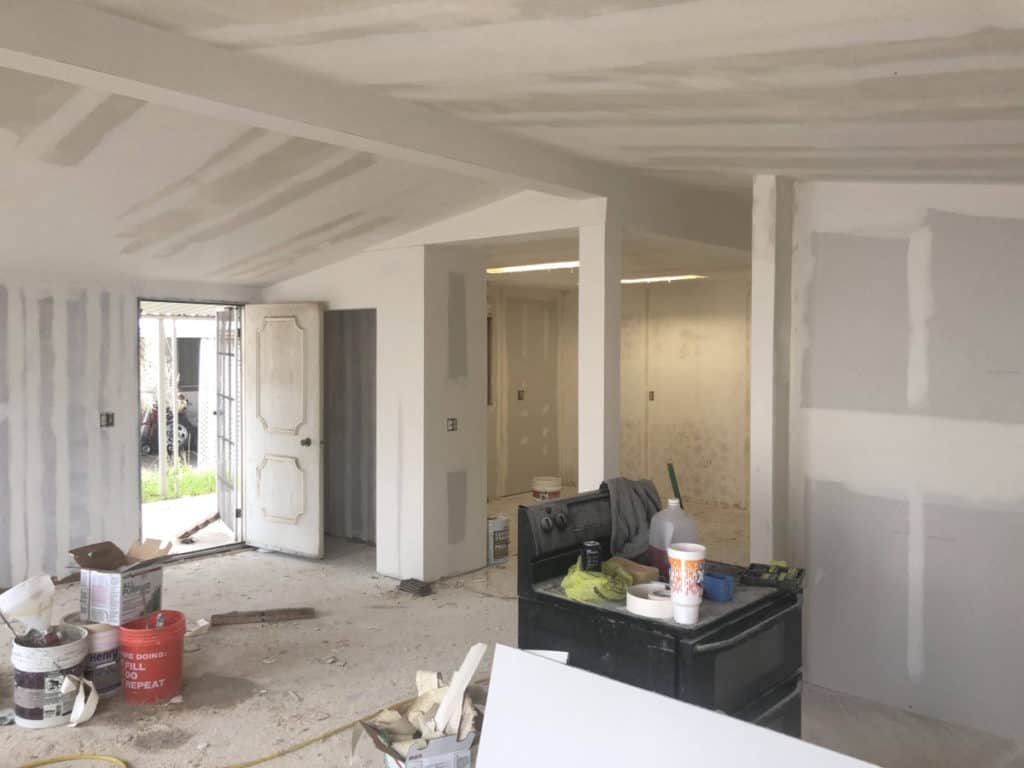
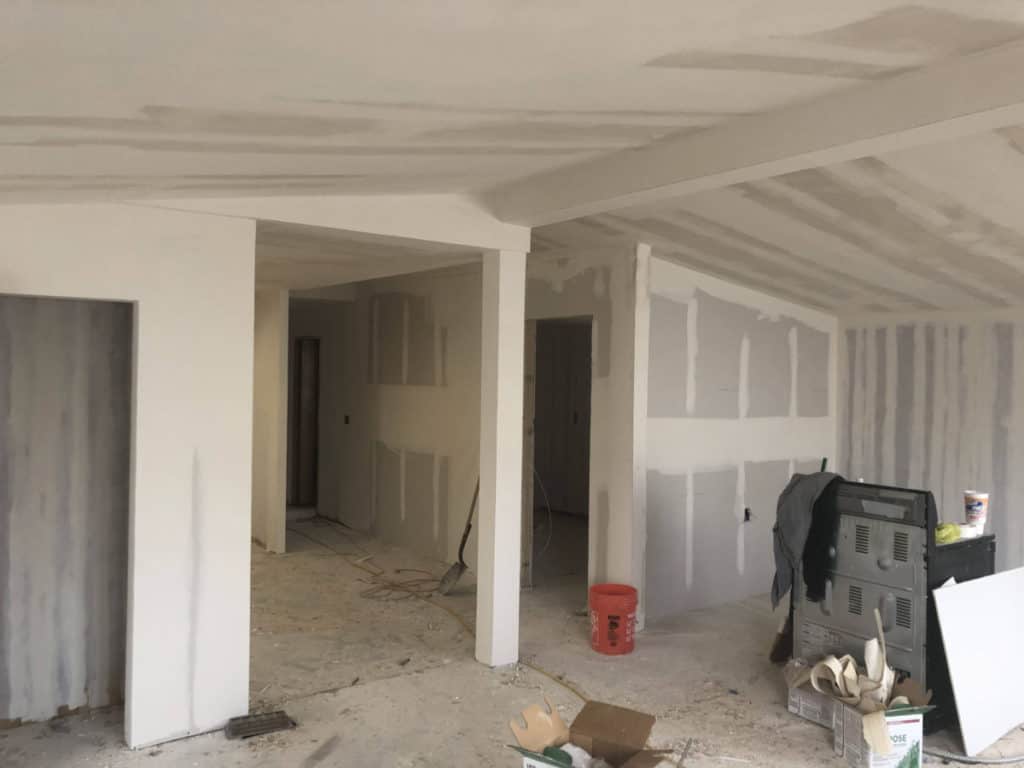
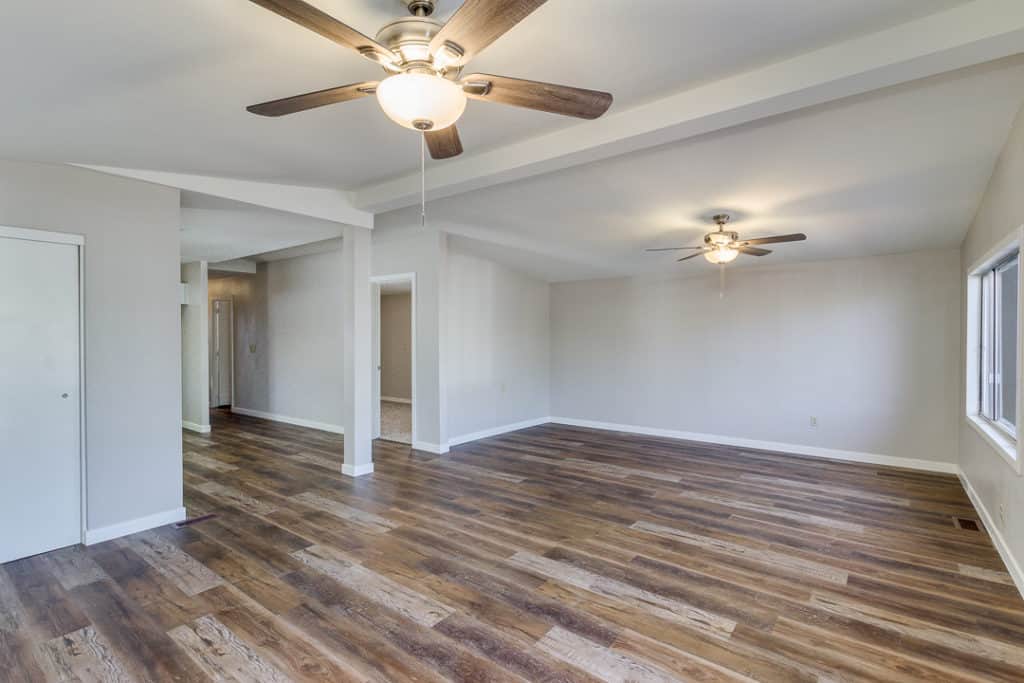
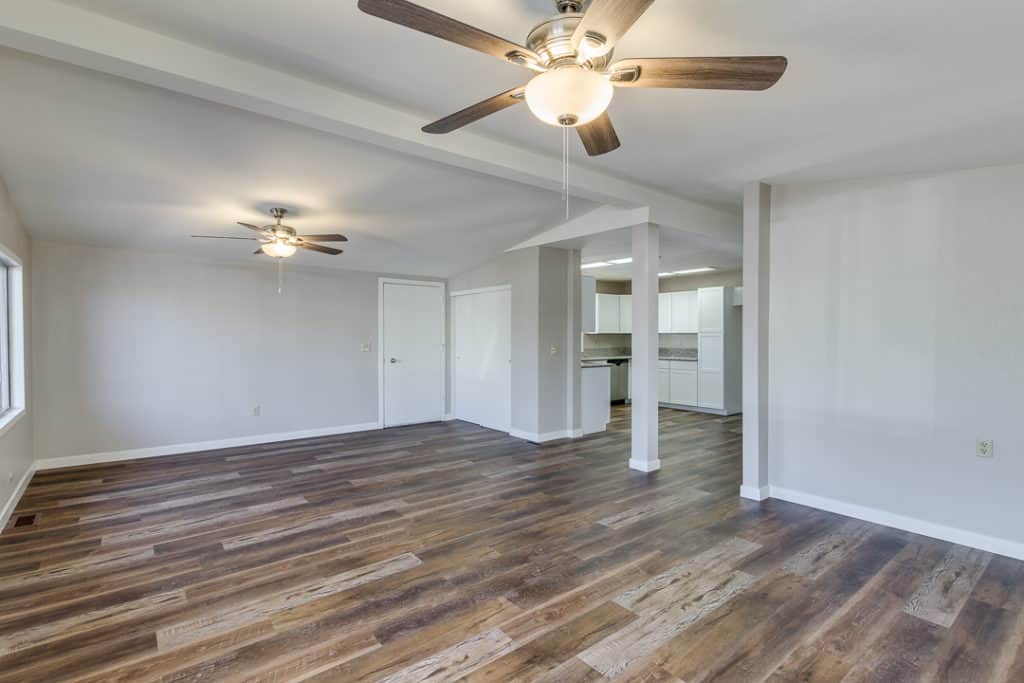
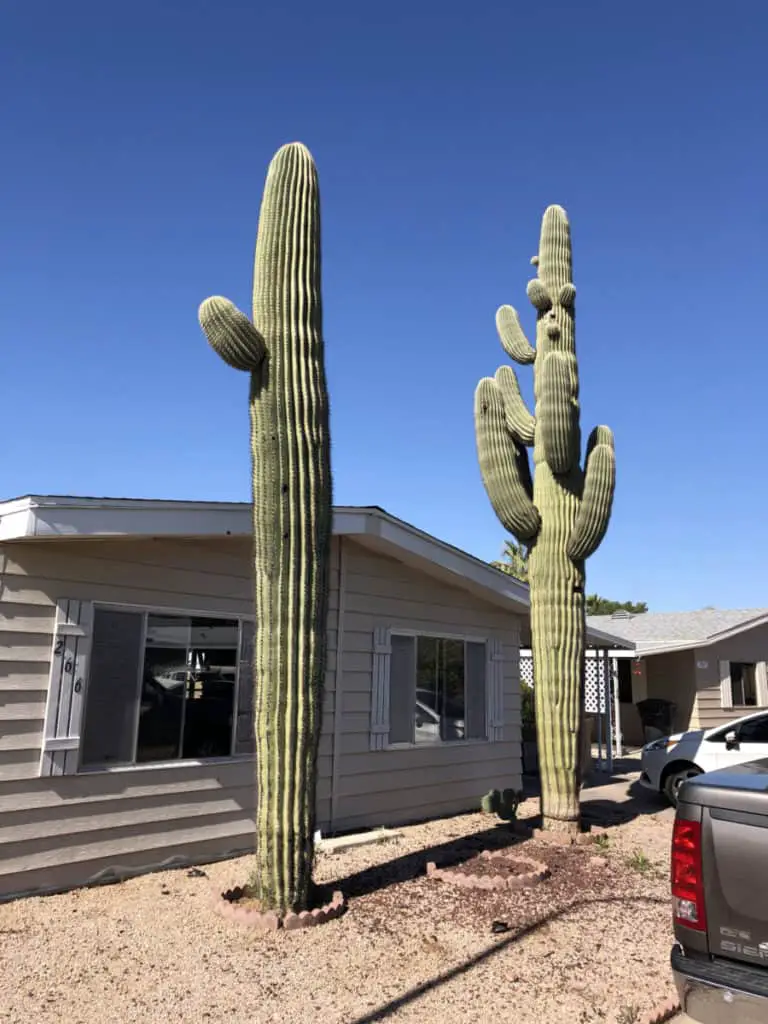
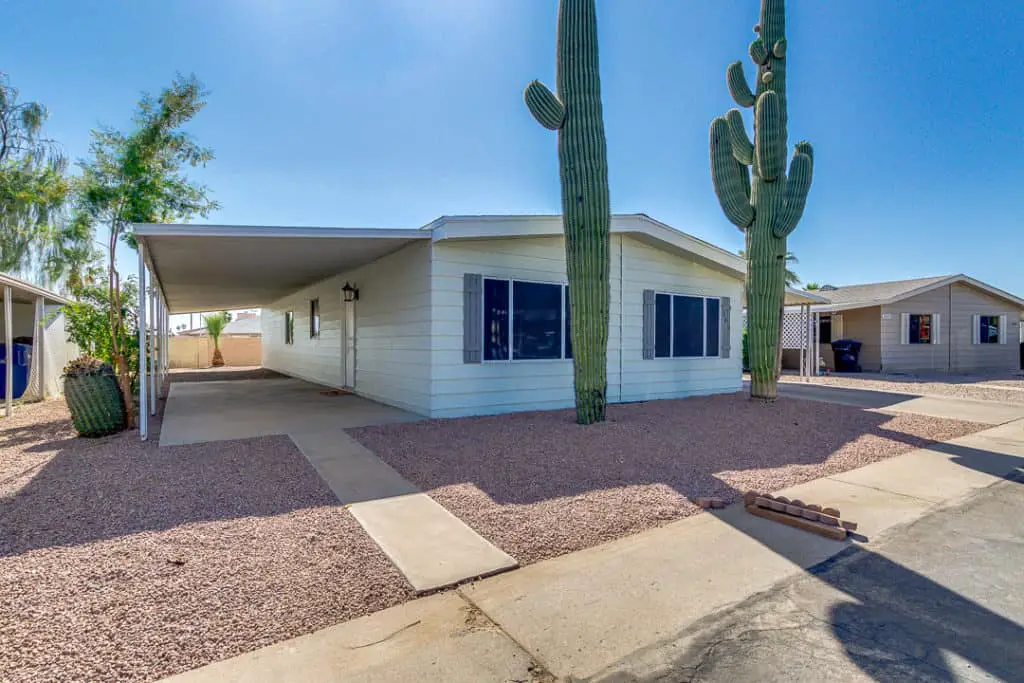
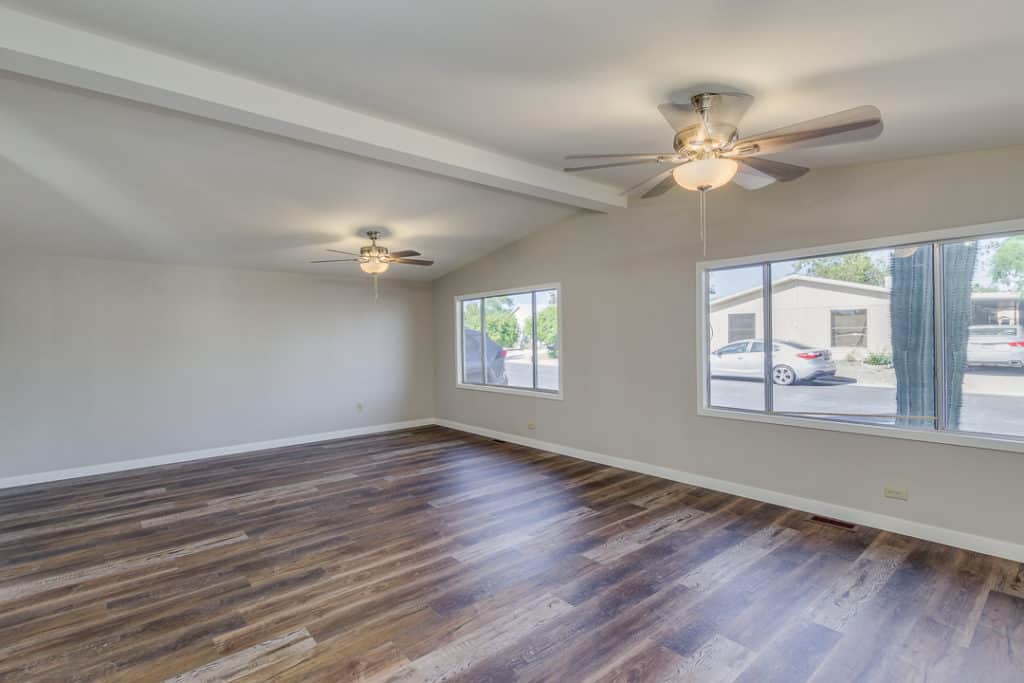
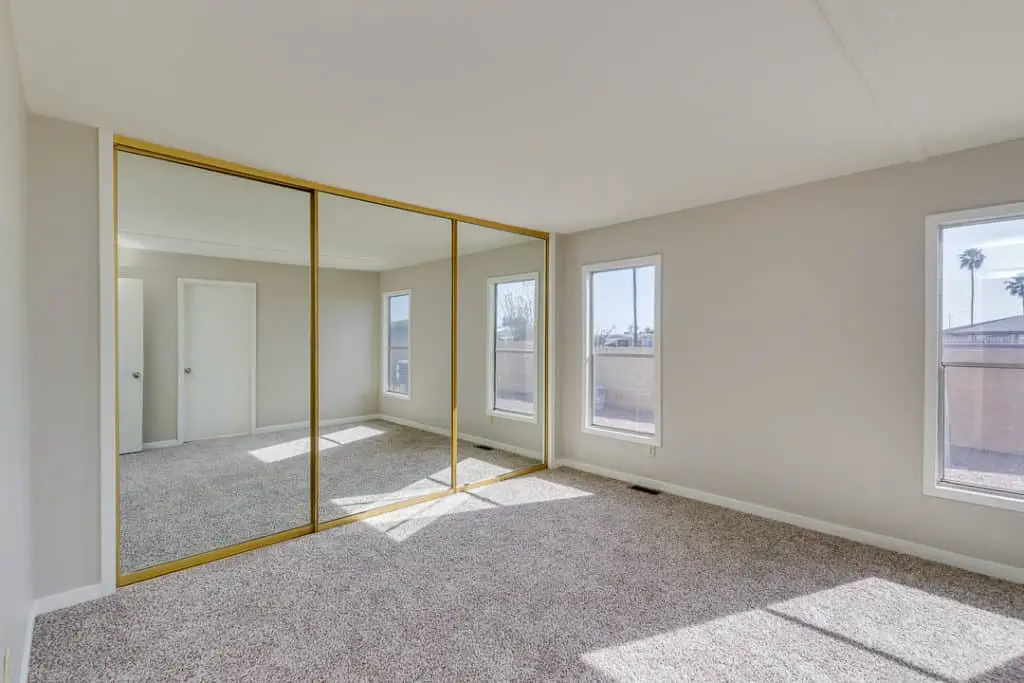
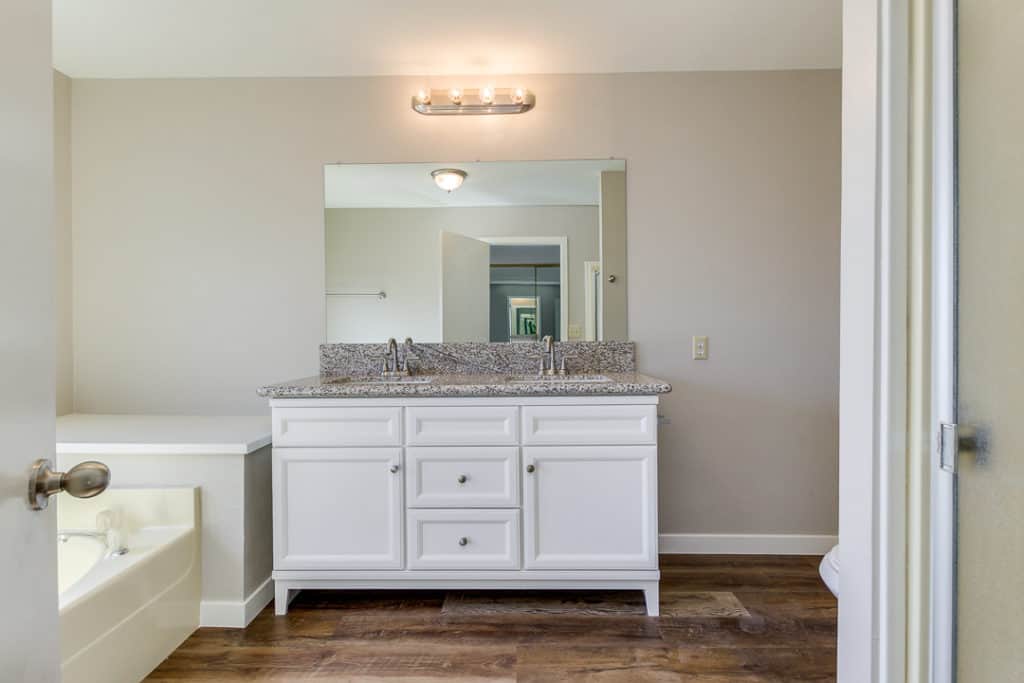
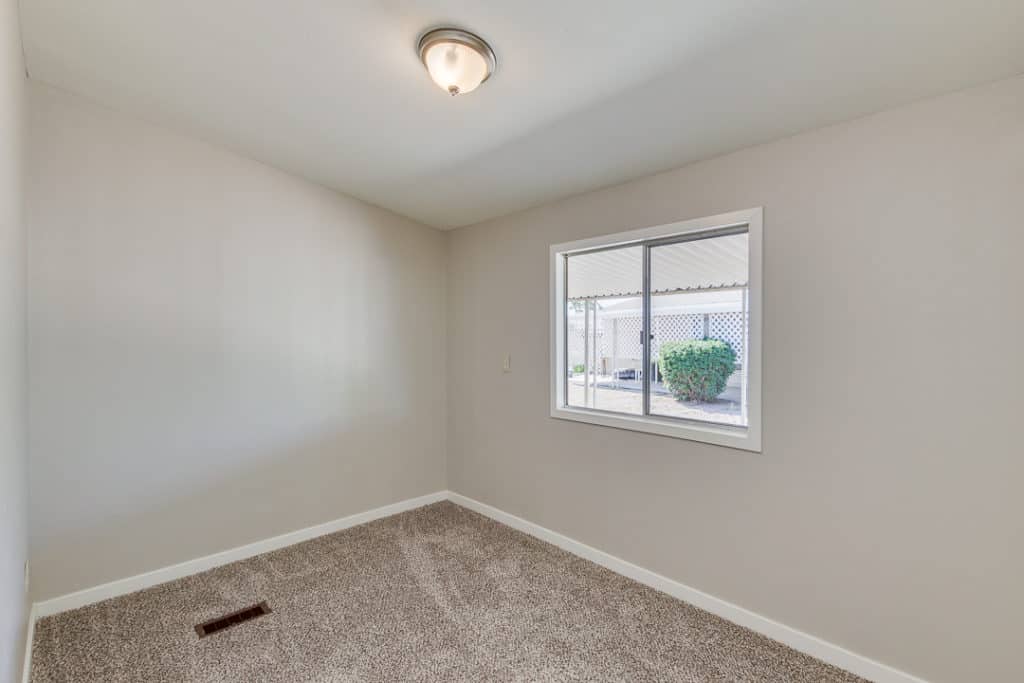
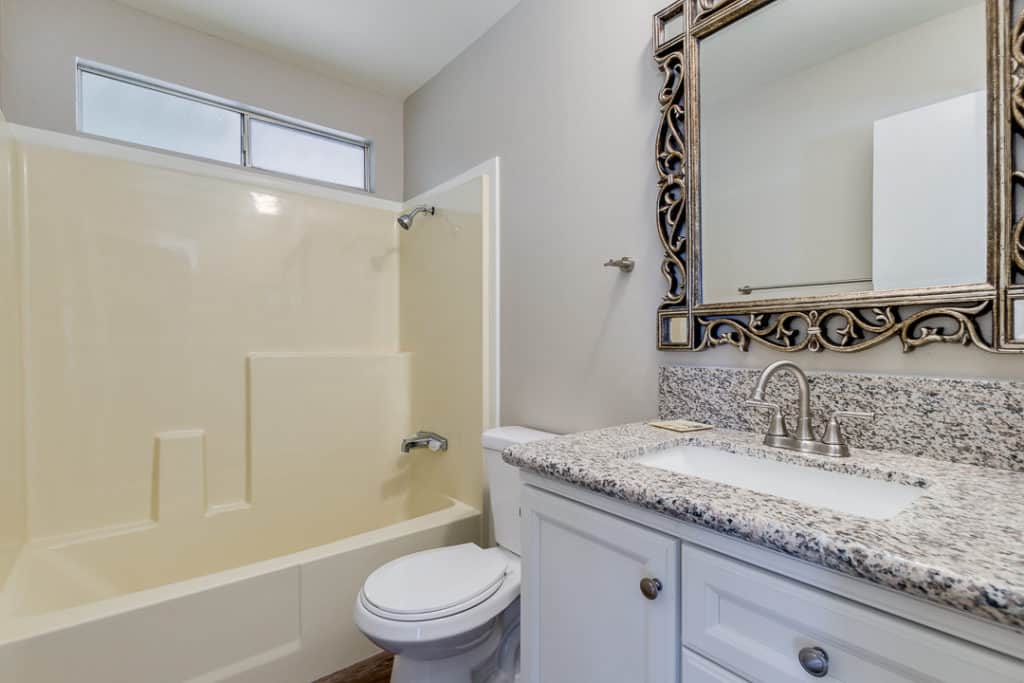
Before we started to do anything, we walked the home carefully with our contractor. This home is a 1983, 2 bedroom, 2 bath home with water damage from the washer in both the laundry room, the bathroom next to the laundry, and the hall next to the laundry. There were also 4 broken windows as well as a non-functioning HVAC system. All of the original cabinets, doors, walls, light fixtures, and plumbing fixtures were still in the home. These were in good shape for the age of the home, but it felt like 1983 inside with the paneled walls and 1980s cabinet and kitchen design. We originally thought we’d keep the original cabinetry and just update it by painting and some new hardware. But, as in many older manufactured homes, the cabinets and doors were faced with a laminate type of plastic; paint doesn’t stick very well to this. Somewhat reluctantly, we decided to replace all of the cabinets. The cost of that was not included when we originally ran numbers for the profit on the house. No matter how much we plan, plans usually change somewhat during the remodel. We also knew that if we could turn the home into a 3 bedroom, it would be more desirable and worth more money. The home is in a family park, so 3 bedrooms are highly desirable as long as we don’t ruin the rest of the floor plan trying to do that. The dining room in this house was perfectly situated to let us make a bedroom out of it by constructing a few walls. The windows and the A/C vents were all perfectly positioned as well without having to change anything. Also, the kitchen and great room were large enough to allow a table and chairs without sacrificing the usability of either room. It was a go for 3 bedrooms. HGTV certainly glorifies “demolition day”, and in some respects it is fund to smash stuff that won’t be used again. But, it is messy, and requires lots of effort to clean up the mess. Before taking your trusty sledge hammer and smashing away, make sure that what you are tearing out will not be damaging anything that will remain. Things like ripping cabinets from the walls can easily damage a wall or plumbing lines. Being hasty while removing old trim can also damage the texture on the walls that will then have to be repaired. Smashing through a wall can also tear apart electrical wires. The point is – be careful! We always order a dumpster to be delivered to the property before starting demolition. This makes the demo job faster and more organized. This way, you’re not removing things from the house and dumping them outside, only to then have to pick them up again and move to a dumpster later. On this particular house, our contractor neglected to order a dumpster before starting work. They piled up everything up out on the driveway. It was like that for days. Not only did it make it difficult to enter and exit the house while working, but then the huge pile of trash had to be picked up again from the driveway and moved into the dumpster. If you don’t create a plan and try and hold everyone working on the homes to a schedule, it is easy for chaos to be created. If your remodeling to sell, or even live in the home, it is frustrating for the project to take longer than you anticipated. We like to realistically plan about 45 days to complete the work from start to finish. Sometimes it is less than that, sometimes a little more, but if we hold everyone to a schedule, it can usually be accomplished. Even with a large remodel. If you’re using contractors instead of doing the work yourself, you’ll want to get a few bids for each type of work. Taking the lowest bid however isn’t always the wisest choice. If you have an bid that appears to be an outlier (far from the price of other bids) as the reason why. It is important to get references from other customers of the contractor. Call them and ask: Doing a little work before hiring a contractor can save you lots of time, money, and headaches during the project. Before really starting the remodel, you should now have a good idea of the overall price and the timeframe to get the job completed. Keep in mind, there will be unforseen costs that will arise. We typically will spend about 10% to 20% more than our original estimates in most situations. Why? As you work on the house, you may decide to replace some items that you originally planned on keeping. You may run into plumbing, electrical, or HVAC issues that were not planned for. After we finalized the purchase of this house, the seller left us a house full of treasure they no longer wanted. The house and storage room were full of junk. Unfortunately this happens more often than we’d like. The first thing we did was to strip out the house of everything that was not going to stay. Not only did this include the junk the seller left behind, but all of the old flooring, light and plumbing fixtures, as well as all the old trim, as we were going to tape and texture the walls, as well as install new trim. As I mentioned earlier, the contractor should have ordered a dumpster, but did not do so right away. He stacked all of the old stuff on the driveway, only to have to move it again into the dumpster after it arrived. This not only creates more work, but also makes access to the house difficult while working. Once we got everything cleaned out, it is easier to take assessment of what we are working with. Notice the hutches in the entryway and the dining room. These will both be removed, although we had not decided to do this initially. The dining room was going to become the third bedroom. This house has an asphalt shingle roof. The shingles looked as if they had been replaced at some point in the life of the home. They were not new, but they were still in good condition, laid flat and did not curl or have bald spots. We used a roof coating to seal the roof and extend the its life. There are all sorts of colors available to be able to closely match the original color of the shingles. When we first evaluated this house for a remodel, we were planning on leaving the kitchen cabinets, just replacing the countertops. Once we decided to make a 3rd bedroom out of the dining room, we realized that the kitchen would feel very closed off with the existing breakfast bar. We decided that we would need to remove as much blockage to the kitchen as we could in order to open the plan up. The cabinets in the kitchen were in ok shape, but they needed painting. We realized that they had been painted once before, and that it was very, very poorly done. Realizing that it would be more work and money to try to refinish them properly, we decided to do new cabinets throughout the house. We felt the additional price the house would sell for as a result would be worth the cost of doing. Lowe’s was having a 20% off sale on their in-stock cabinets right after we made the purchase of this project. We purchased their ready-made white shaker cabinets for the kitchen, and then some of their pre-made matching vanities for the bathrooms. It was a wise purchase that added tremendous appeal to the home. In a few remodels we have done, we’ve actually saved the original ancient laminate countertops the mobile home came with because they were still in good condition and we keeping the original cabinets. We have also put in new laminate countertops in quite a few remodels. One thing we’ve learned along the way is that we can do granite tops for only about 1/3 more than the cost of new laminate tops. Also, with the granite, we get far more bang for our buck when it comes time to sell the home. If you look around, you’ll most likely find pre-cut granite or quartz countertops available for a very reasonable price. For this home, which had a sizeable kitchen and 2 bathrooms, we $850 for the actual granite and $1,300 for the fabrication and installation. Lots of older mobile homes have built-ins. In my opinion, those old built-ins make the home feel like “an old mobile home”. Newer stick-built or even manufactured homes rarely have these things. We decided to remove the hutch in the entryway and replace it with a closet. You can see the built-ins in the 3rd picture above in both the entryway and the dining room. These really date the property, so they were removed to give the home a more up-to-date feel. Also, notice the popcorn ceilings. They were in good shape and we initially thought to just paint over them. But, once we we started peeling back the layers of the house we realized it would be worth the cost to remove the popcorn and texture the ceiling. The cost to remove the popcorn and retexture the ceilings costs about $1.25 per square foot. At first we just removed the popcorn in the living room, kitchen, and hallway. As our scope of work kept growing, we decided to do the entire house. I’m glad we did, as it would have been hodgepodge only doing parts of the house. The house had wood paneled walls, except for the bathrooms, laundry and kitchen. The walls in those rooms were 1/4″ drywall with vinyl paper. All the panels throughout the house had the typical plastic moulding strips over the panel joints. We have often painted the wood paneled walls in other mobile home remodels, and they turn out looking nice. The paneling in this house was in good shape. Because of the water damage in the laundry room and bathroom, and the drywall buy the kitchen window, we knew we would be putting up new drywall in those rooms. Also, we were going to frame the 3rd bedroom and put drywall on those new walls. We decided to tape and texture over the wood paneling for a much more cohesive look throughout the home. We have done this in a number of homes and the walls come out looking like drywall without having to replace all of the wood paneled walls. The cost to tape and texture runs just over a $1 per square foot of home. This particular house is 1,344 square feet and we paid $1,500 to tape and texture all of the wood paneled walls. Also, notice in the picture above the hundreds of cheap moldings that cover the seams and go around just about everything. These were all replaced with traditional moldings. Doing this really helps make the house feel like a traditional stick-built home; the cost is very reasonable for the appearance achieved. If new doors are needed, the cost can be significant. In this house, all of the flat panel doors were in good condition, including the two exterior doors. We did have to buy one new pre-hung door for the 3rd bedroom we created. All that was needed was some good sanding and prep-work to get them ready for paint. In most of the homes that we remodel, we do have to buy new doors as the old mobile home doors tend to be in bad condition, as well as cheaply made. When buying doors, we almost always buy pre-hung doors at Home Depot. The windows in this home are the original 1983 single pane, aluminum framed windows. Four windows across the back of the house were broken. We really wanted to replace the windows with new vinyl double paned units, and in retrospect we probably should have done so. It only cost a few hundred dollars to repair the broken windows. We also spent about $400 on sun screens to protect the east and west sides of the home from the sun; since the existing windows were inefficient single pane. Had we replaced all the windows with new ones, it would have cost a total of about $2,800 instead of the $700 we spent for screens and window repair. When the home was completed, we realized we should have replaced the windows. However, when the house went up for sale, nobody that previewed the home ever mentioned the old original windows. We always like to do 2 tones with our paint. It adds a lot of perceived quality and value. Like anything, prepping properly for the paintwork is what will make the project turn out with a high quality look. In most every job we do, we have to make sure the walls are primed throughout the house. When new drywall or texture is applied to walls, a primer is a necessity to keep the paint from soaking in. In this house, the original aluminum siding was dirty, but looked like it would clean up with a good power washing. Well, it didn’t. We ended up having to paint the outside for a cost of $800 which was not in our original budget. Painting the exterior allowed us to bring the color to something more current that the old wood-look beige that was on the original. As mentioned previously, the water line in this house had leaked inside the wall between the laundry room and the hall bathroom. The result was a ruined sub-floor in the laundry, part of the hall, the hall bath, and even a small part of the master bathroom which is next to the hall bathroom. Don’t be discouraged by soft or bad sub-floors. They are an easy and inexpensive fix. When remodeling any area of the home where there has been water damage, it is important to treat the area for any mold growth. With the house being 37 years old, there were a few other small soft spots in the sub-floor. A couple of spots in the hallway by the kitchen and another in one of the bedrooms. We repaired these areas while doing the rest of the sub-floor. We always want to make sure that the flooring is solid underneath our new flooring. At times it is necessary to level out the floors with floor leveler. We had a low spot in the hallway that we filled in with the leveler. If this is not done, when completed, you’ll feel low spots in the floor when walking. Also, if you’re installing anything but carpet, you’ll most likely see low spots from the reflections on the floor. We wanted to do a luxury vinyl plank floor in throughout most of the living areas, then carpet in the bedrooms. Quality vinyl planking can cost quite a bit if you don’t shop around. In most larger metro areas, you’ll find building contractor wholesalers where you can purchase quality flooring at far less than retail price. The flooring planks we purchased cost $1.69 per square foot. We then paid $1.10 per square foot for installation for a total installed price of $2.79 per foot. had we purchased this flooring at retail prices, the floor planks alone would have been close to $4.00 per square foot. It pays to shop around. For carpet, we always buy our carpets at Home Depot in their bulk carpeting area. It is possible to get high quality carpet for just over $1 per square foot. With pad and installation, we’re under $2 per square foot for carpet. In pretty much every remodel that we do, we replace all of the fixtures throughout the home. For about $1,000 we know that we can put in modern attractive fixtures that really add value to the home. The only place where we may keep the old fixtures is in the shower or tub if they are in good condition. That is exactly what we did in this house. The shower and tub fixtures are original. We cleaned them up to be shiny and look like new. All other fixtures are new, including the toilets. The landscaping when we purchased this house was hideous indeed. The desert gravel landscape was completely covered in weeds. What few plants existed were overgrown and had not been trimmed in years. Creating curb appeal we believe is major in selling one of our homes for top dollar. That doesn’t mean that it has to be expensive. We generally hire a handyman or landscaper off Craiglist to come in and trim everything up, clean up all the exterior junk, and spread new granite over the yard. It always makes a HUGE difference and is absolutely worth the $500 or so cost. We purchased this 1983, 24 x 52, 2 bedroom, 2 bath house for $4,000. Our plans were to turn it into a 3 bedroom, spend a total of $20,000 in renovations and well it for $45,000. This would have given us a profit of $21,000. What ended up happening is we spent $30,065 in renovations. Once you get into a property, it almost always costs more that originally planned. As long as the extra money spent means more money when it sells generally is ok. We Sold the home for $55,500, netting us a profit of $55,500 – $30,065 renovations – $4,000 purchase price = $21,435 in profit. Fix-up costs beyond our original scope: These unplanned costs came to a total of $6,880. There were also an additional $2,500 in unplanned costs that we spent for electrical issues and reconfiguring the laundry room to properly fit a washer and dryer. Selling The House When we put the home on the market, we had 4 cash offers within about a week! It turned out to be a fun and profitable project. Whether you remodel to live in the home or to sell it for a profit, documenting the entire process ensures compliance. If you are unsure of your home’s age or original specifications, check our guide on locating and reading your Mobile Home VIN and Data Plate. The secret? For every dollar you put into the old mobile home, you want to be able to get a $2 return on the investment. If you hold to that formula, rarely would you ever lose money. When actually doing the remodel, it is tempting to keep putting money into it, regardless of the return. We have often been guilty of doing too much! The following are the steps we take at Mobile Home Friend as we remodel an older mobile home. There are thousands upon thousands of great deals to be had on older mobile homes; all across the country. So, finding the right bones to work with will go a long way in making sure your investment pays you dividends. We are often offered mobile homes for free from various parks, or tenants in parks looking to get out. And, we turn many of these down! Why, you ask? We find some of them simply aren’t worth putting any money into them. Each case is unique and depends on the given the market surrounding that house. Roof coatings are like a rubberized glue that gets “rolled on” the roof like paint. It helps seal cracks to keep out water leaks, and it’s also generally white, which reflects the heat off of the roof. It is one of the greatest and least expensive ways to extend the life of your roof; keeping your home dry and cooler. Written by a professional investor who has personally renovated over 100 properties, including numerous older manufactured homes.
Demolition Day
Select Contractors And Create A Work Schedule
Executing The Remodel Plan
Cleaning Out

Scope Of The Work

Roof
Cabinets
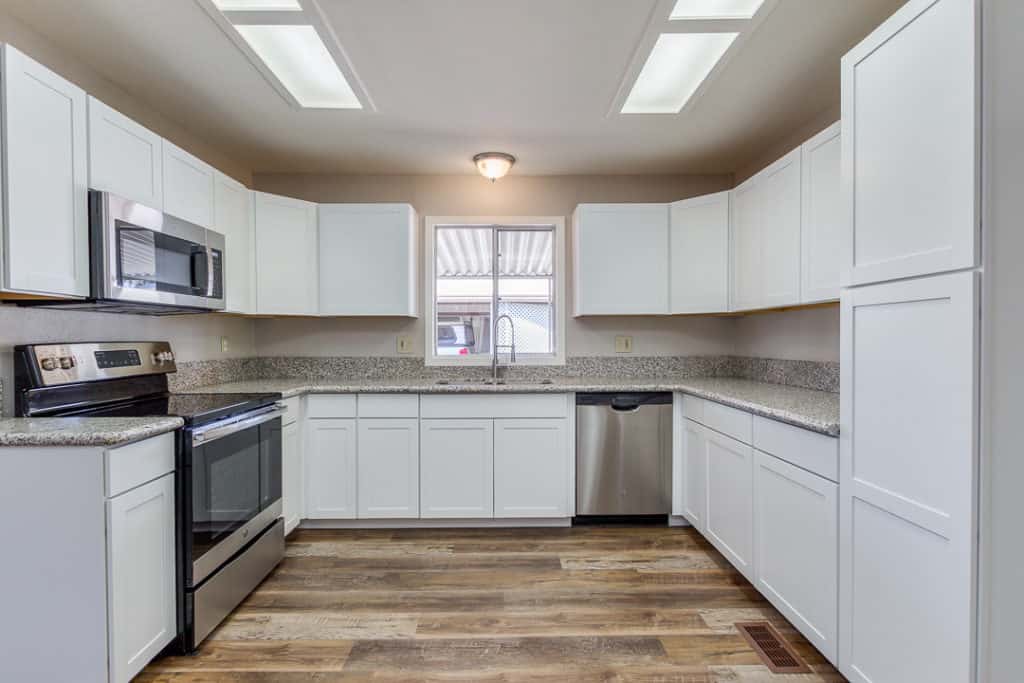
Countertops
Built-Ins
Popcorn Ceilings

Wood Paneled Walls

Doors
Windows


Paint
Flooring


Light And Pluming Fixtures
Landscaping
Summing It Up
Related Questions
How do you update an old mobile home?
Do mobile home roof coatings really work?
