
The margins on flipping stick built homes in our area have become razor thin and difficult to find with all of the iBuyer activity in our area. iBuyers are better known as Opendoor, Offered, and Zillow among others. A few years ago, the Phoenix market became one of their testbeds to test the process of buying and flipping homes on a very thin margin.
Through extensive research, we found a course on mobile home investing through John Fedro. Very knowledgeable guy and very helpful through the process of learning. He taught us how to find, buy, repair and sell mobile homes for profit.
Table of Contents
Short Answer
This mobile home flip became known as ASP243 to us (simply the park identifier and lot number). We followed closely the formula that had been taught to us in the John Fedro course and did very well on this home.
|
Description |
Amount |
|
Purchase Price |
$2,500 |
|
Repairs |
2,700 |
|
Sale of furniture included when we bought |
-700 |
|
Total Invested |
$4,500 |
|
Down Payment Received |
-5,000 |
|
Total Invested After Sale |
-$500 |
|
Monthly Payments Received (Payments were set to amortize over 8 years at 8% interest) |
$452 |
Let’s take a closer look at how all of the above was accomplished!
Bandit Signs
There are all sorts of ways to find mobile homes to buy. Some of the best are:
- Talking to mobile home park managers
- Placing bandit signs along the road
- Placing ads in Craigslist
- Driving parks looking for homes for sale
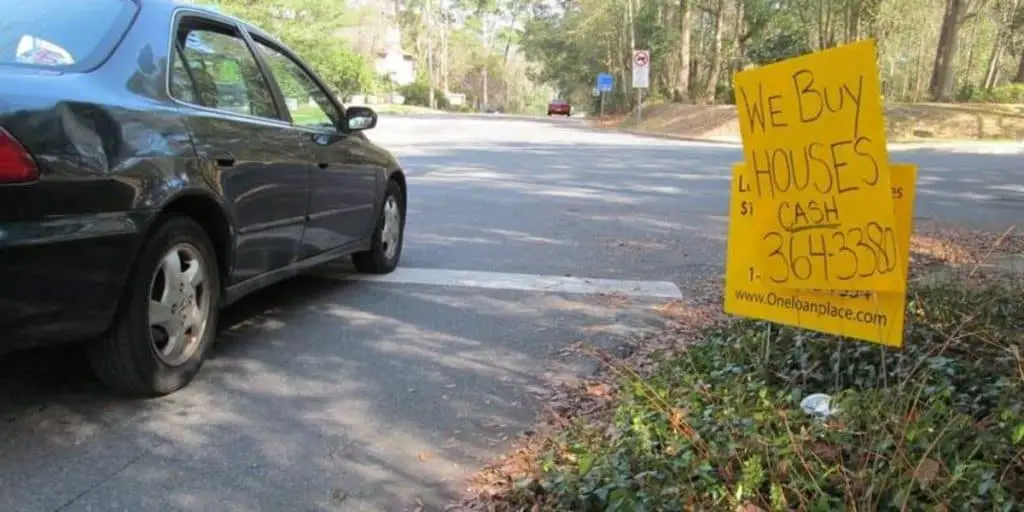
We have tried every one of these methods and are pleased to say that we have successfully found deals using each one of them. But, in this particular case the use of bandit signs found us the deal.
Manufactured homes and parks in our area of town are fairly concentrated in an area about 2 miles wide and 10 miles long. In this area there are manufactured home parks that cater to families, and others to the 55+ crowd. These parks also range in quality from a 1 star to 4 star parks. Some are large, some are small.
In addition to the mobile home parks, there are many subdivisions that are zoned for manufactured housing. Within the subdivisions, the home owners own the land under their homes as well as the home itself.
With a large concentrated area, we created bandit signs to use. Bandit signs are simply homemade signs placed on stakes by the roadside. We purchase bright yellow signs and use a thick black Sharpie marker for the writing (Kingsize Black Sharpie Markers).
To place the signs into the ground, we purchase metal H-stakes that hold the sign firmly into the ground (Metal H-Stakes). We find that by cutting the stakes into two, we not only get two for the price of one, but the sign is also closer to the ground and resists winds much better.
In our area, the ground can be very hard and difficult to get the H Stakes to sink into the ground without bending up the H-Stake. We discovered a very simple solution to this problem. We purchased a cordless drill (Cordless Drill) and two (Lithium Ion Battery). By using a long (Carbide Drill Bit), we can drill into the hard ground in a matter of seconds. This allows sturdy placement of our bandit signs.
Over the last few years, placement of these simply bandit signs have brought us several deals. We actually had some signs professionally printed up, but what we found is that more calls come in with the hand written signs. Go figure!
Finding The Deal
So on ASP243, we received a call from a lady telling us she wanted to sell her 1987 24 x 48 manufactured home. She had seen one of our bandit signs close to the park where she lived. I asked her a little bit about the park and her home to find out if it was something we had interest in.
The park sounded like a very nice 3-star all ages location. The home was a 3 bedroom, two bathroom home with an updated kitchen. On the phone, this sounded ideal.
Inspecting The Property
As we learned in our course from John Fedro, the inspection is extremely important before committing to a house or a deal. When I arrived at the house, I noticed that the exterior was sided in T-111 fiberboard. It was in ok shape with a bit of rot on the trim around the windows.
The interior looked beautiful. In fact, it made me wonder why she wanted to sell. The flooring throughout the house was in great shape. The cabinets were painted white and looks like they had been taken out of a stick-built home. Each room was a different color, not the best situation. The bathrooms were in decent shape as well. I checked the floors for any soft spots that might be apparent. I could tell there were a couple of soft spots in the kitchen, but not yet bad enough to repair.
I also pressed with lots of force against all of the exterior walls in every room to see if there was any unusual give or movement, they all seemed good. However, upon inspecting the exterior of the home, I found significant termite damage along the back wall of the home. The siding had been eaten away, so I was sure that the wall had additional damage inside that might be significant.
In Arizona, with our summer heat, a good HVAC system is a must. We were inspecting this home in the summer, and I could tell that the air coming from the system was not as cold as it should be.
Other than the termites in the back exterior wall and the weak HVAC system, the house was sound.
The home also had a beautiful dining room table and a hutch that the seller told me she would be leaving with the house. I told her that it was worth decent money and that she should try to sell it first. She told me she didn’t want to bother.
Before Pictures
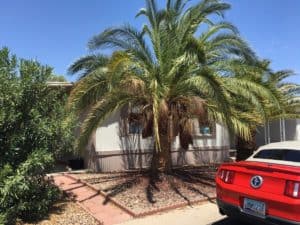
This house was in overall good condition. Very little had to be done in preparation for sale other than the items mentioned in the “Repairs” section below. If only they could all be like this.
Some elbow grease inside and out did wonders for this home.
Negotiating The Purchase
We knew that we may have to replace the HVAC system with a refurbished one that might cost about $2,000. We also knew that we could end up spending about $2,000 on repairing the termite damage. So, we I figured that we would be spending at least $4,000 plus the cost of the purchase of the home.
The lady told us she wanted $3,000 for the house. We explained the repairs we’d have to do in order to get the home ready for resale. She understood and we settled on a purchase price of $2,500.
Making The Repairs
Termites
This was an area of real concern. We had no idea how extensive the termite damage would be once we opened up the walls. We removed the bad siding all across the back of the termite affected portion of the home. Once opened up, we realized that the damage was not as extensive as originally thought.
Still, we did have to replace a few studs and lower plate on the outer wall that was damaged. We then had the entire home treated for termites. Once treated, we then replaced the exterior siding to match the rest of the home. (Total cost $1,100)
Paint
We ended up painting most of the interior to tone down the varying colors throughout the house. The paint was already in overall good condition.
On the exterior, we had a large wooden deck on one side of the house that had peeling paint. The deck was scraped and prepared for new paint, and painted. Also, there were quite a few windows that had rotted trim around them. We removed the trim around the windows, installed new trim, and then painted the new trim with a contrasting tone to the body color of the house.
We ended up painting the full back of the house in order to get the paint on the new siding to match with the rest of the back. Since the entire back side of the house was painted to match as closely as possible the remainder of the house, it looked great when we were done. (Total cost $800)
Interior Trim
At some point the kitchen cabinets had been replaced and painted with some out of a stick-built home. They did an overall decent job of fitting them into the area. Whoever did this work had modified a wall between the kitchen and living room.
When the modified wall was done, it did not go all the way to the ceiling, nor did it have any trim the open top. We came in and trimmed out the wall to give it a finished look. (Total cost $400)
Miscellaneous
There were also a few other small repairs that we did inside the home before putting it up for sale. The house had a few mismatching door knobs, so we changed those out. (Total cost $150)
HVAC
This was one of my bigger worries with this house. The existing unit was only blowing cool air, not cold. If I had to replace the unit, we would end up spending at least $2,000 even for a used, refurbished one. My A/C technician that I have used for years tested the system and found a small leak. We repaired the leak, cleaned the coils and recharged the system. We were happy to have dodged a bullet here. (Total Cost $250)
Dining Room Furniture Included with the Purchase
The house had a ornate looking dining room table, chairs and hutch that we were given by the seller. It looked far more expensive that it really was. I took a couple of pictures, posted them on Craigslist and had it sold for $700 in less than an hour.
This was just an added bonus because the money received for this unneeded furniture reduced our investment outlay in the home.
Repairs Summary
Overall, this was one of the easiest fix up jobs I have done on a renovation. With everything included, we spent a total of $2,700 doing all the work.
After Pictures
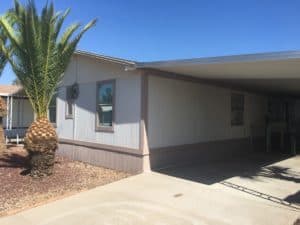
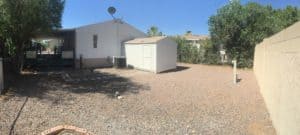
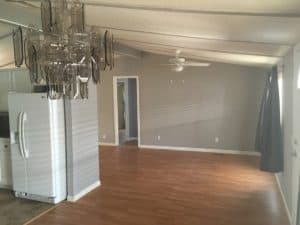
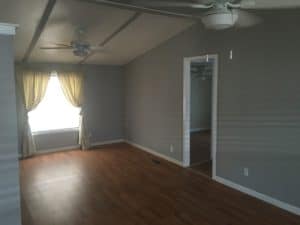
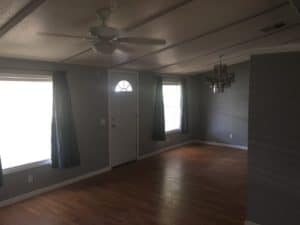
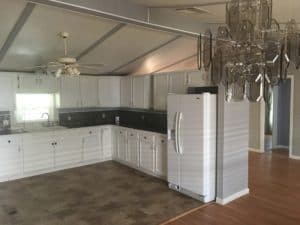
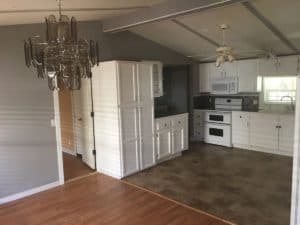
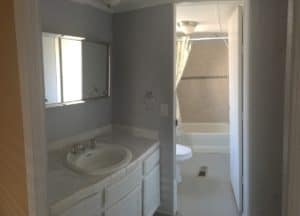
Pricing The Home
When we finished getting the house ready for sale, our total investment after selling the dining room furniture was $4,500. We were very pleased as we knew we’d make money on this one. The house was not quite fixed up to the standards that I usually like to bring a property to, but we learned a lot on the first project that we did; CCV35 (follow the link to see the post on that house).On that house we went far overboard with the costs. We were determined not to repeat that error.
Similar homes in the park had sold within the previous 12 months for around $35,000. We wanted to follow as closely as possible the formula that we had learned from our investing course with John Fedro. We decided on a price of $37,000. I now see that since we were willing to carry the note, we could have probably priced it in the low $40k range and been fine.
Attracting Buyers With Pictures
With our regular real estate business, we always have professional photography done when listing a home. We have started to do this also with our mobile homes, but did not do it at first.
Great photography is the magnet that brings the interest from the buyers. Since virtually all buyers start the buying process online, we generally only have one chance to lure their interest. Great photography does that!
Being the shirt-sleeve photographer that I am, I pulled out my trusty iPhone and snapped pictures in order to get this house on the market. As you can tell from the photos, the lighting is wrong, and the pictures appear washed out. I don’t do this anymore.
The Sale Process
At the time in Arizona, we were not able to advertise mobile homes in parks on the local real estate multiple listing service. We are able to do that now and it makes selling a lOT easier.
Advertising
We placed ads in the following:
- Craigslist
- Zillow
- Sign in the front window
- Bandit signs around the area on street corners
This was enough to get the phone ringing. From the start, we planned on carrying the note on this house, so in the ads we listed as much detail as possible:
- Details on the house
- Photos of the house
- Requirements of the park
- No convicted felons
- No sex offenders
- No evictions
- $5,000 down payment required
- Carry back the note at 8% interest
- Stable employment history
- Total debt not to exceed 48% of monthly income
Weeding Through the Applicants
Our phone rang and rang. We had a voice message that asked the interested parties to go online to a specific webpage. On that page, the process was explained in detail and the prospect was asked to complete the application. This helps to weed out people who know they will not meet the criteria.
If the prospect completes the application and they still have interest we then show them the house. During the first week we showed the property to 4 different people. One prospect was a local nurse and fit perfectly what we were looking for.
Did We Make A Profit?
Yes, indeed we did! We followed closely the course from John Fedro that we invested in. Guess what? It seems that when we follow directions, we made a profit; just like we hoped! This was very unlike the first deal that we did where we ended up investing $30,000 into the home and having to carry back an 8 year note just to get our money back.
|
Description |
Amount |
|
Purchase Price |
$2,500 |
|
Repairs |
2,700 |
|
Sale of furniture included when we bought |
-700 |
|
Total Invested |
$4,500 |
|
Down Payment Received |
-5,000 |
|
Total Invested After Sale |
-$500 |
|
Monthly Payments Received (Payments were set to amortize over 8 years at 8% interest) |
$452 |
|
Profit Calculation |
|
|
Sales Price |
$37,000 |
|
Total Invested |
-4,500 |
|
Net Profit |
$32,500 |
What was really exciting about this deal is that after receiving the down payment of $5,000 from the buyer we were already in the black and had all of our capital back. We now had an annuity of $452 per month that we would be receiving for the next 97 months. Not bad!
Related Questions
What if you have to take the home back?
This is a valid concern for anyone who carries paper on any asset sold on an installment sale. As long as you are purchasing and remodeling your investment according to plan, having to take a home back, at times, can be a very good thing.
After 3 years of receiving $452 per month on this home in this blog, we did have to take it back. It turned out to be a very profitable event.
