
Table of Contents
Introduction
I have spent over 20 years in the trenches of the real estate industry, and have flipped more than 100 properties. A significant portion of those were manufactured homes that were hemorrhaging money through poor thermal envelopes. If you own a mobile home, you are living in a structure that is fundamentally different from a site-built house. The laws of thermodynamics do not change, but the way they attack a mobile home is unique. This is not a hobby for me: it is a matter of structural preservation. Heat loss is the silent killer of your bank account. It is not just about a high utility bill: it is about the structural integrity of your home. When heat escapes, it often carries moisture. That moisture hits cold surfaces, condenses, and creates rot. I have seen 1,200 square foot double-wides with heating costs higher than 4,000 square foot luxury homes. This is unacceptable. It indicates a failure of the building envelope that, left unchecked, will lead to the total loss of the asset. In this guide, I am going to break down exactly how to stop the bleed. We are going to look at the belly, the walls, and the roof with extreme technical granularity. We will talk about R-values, the specific materials that work in the manufactured housing world, and the hard costs you can expect to pay in 2026. This is not a fluffy DIY blog post. This is a technical manual for people who want to protect their investment and ensure their home remains viable for decades to come.
Video Guide Overview
Affiliate Disclosure
I believe in transparency. This article contains affiliate links. If you purchase through these links, MobileHomeFriend.com may earn a commission. I only recommend tools and products that I have used on my own job sites or that meet the rigorous standards I demand for property longevity. My reputation is worth more than a referral fee.
The “Short” Answer
If you want to stop heat loss in a mobile home, you must prioritize the underbelly and the roof. These two areas account for nearly 70% of total thermal transfer. In 2026, the most effective method for existing homes is a combination of closed-cell spray foam for the undercarriage and blown-in fiberglass for the roof cavity. You should aim for an R-value of at least R-30 in the floor and R-40 in the ceiling. If your belly wrap is torn, your insulation is effectively useless. Seal the air leaks first, then add the R-value. Without an airtight seal, insulation is just a filter for the wind.
The Science of Heat Loss in Manufactured Housing
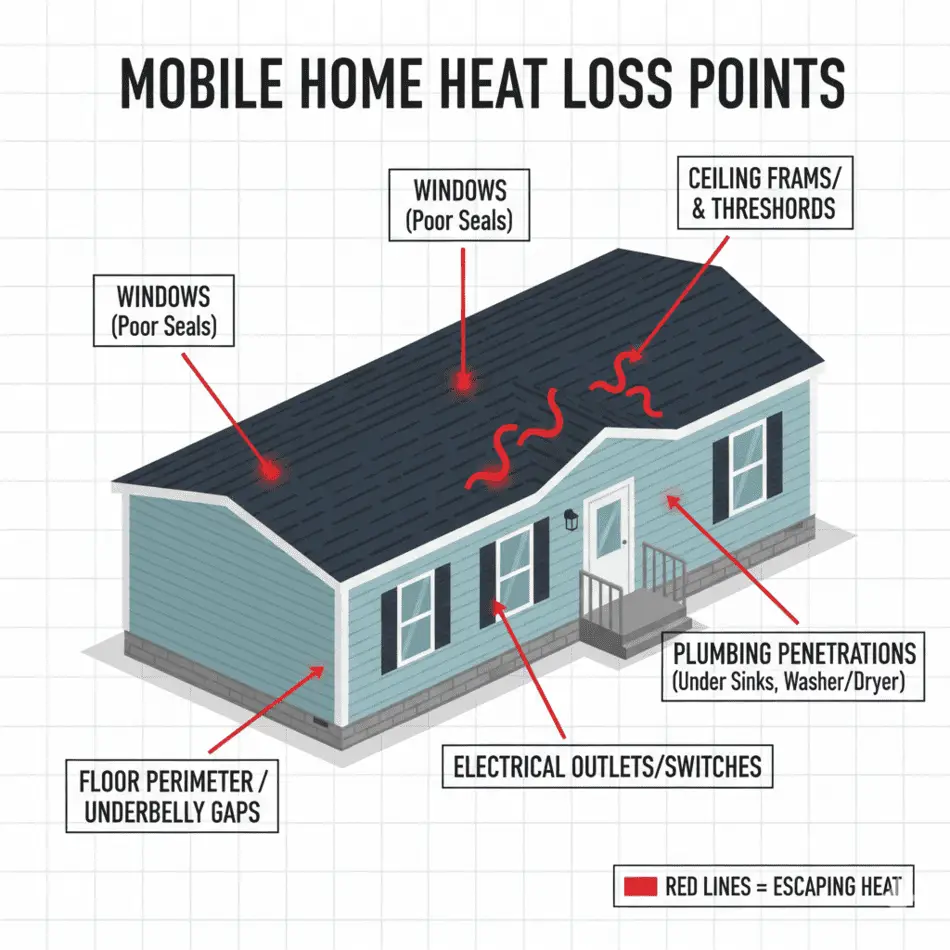
Before we talk about materials, you need to understand the “Stack Effect.” This is the primary driver of energy loss in mobile homes. Hot air rises. In a mobile home, as heat escapes through the roof or ceiling leaks, it creates a low-pressure zone at the floor level. This vacuum pulls cold air in through every crack in the floor, every plumbing penetration, and every tear in the belly wrap. If you have a hole in your mobile home skirting or a tear in your belly wrap, you are literally vacuuming the winter air into your living room. You cannot stop the stack effect by just adding more insulation to the ceiling. You must seal the bottom of the vessel. Think of it like a hot air balloon: if the top is open, the air escapes, but if the bottom is open, the balloon cannot even inflate because the cold air enters from below.
Thermal Bridging: The Invisible Thief
Mobile homes are often built with 2×4 walls or, in older models, even 2×2 or 2×3 studs. These studs act as “thermal bridges.” Wood is a poor insulator compared to fiberglass or foam. Every few inches, you have a solid piece of wood connecting the warm interior wall to the freezing exterior siding. Heat travels through these bridges regardless of how much insulation is between them. In my 20 years of flipping, I have seen homes where you can see the outline of the studs on the interior wall because of “ghosting”—where dust settles on the colder parts of the wall. To combat this, we use rigid foam board on the exterior during residing projects to break the bridge. This puts a continuous layer of insulation between the studs and the outside world.
Vapor Barriers and Moisture Traps
The biggest mistake I see “handymen” make is the improper placement of vapor barriers. In a mobile home, the “belly wrap” (the black plastic on the bottom) acts as both a barrier and a container. If you trap moisture inside your floor joists because you added a second vapor barrier in the wrong spot, you will rot your floor in less than three seasons. Logic dictates that you want the home to breathe out, but keep the wind from blowing in. Moisture moves from warm to cold. In the winter, the warm, moist air inside your home wants to escape to the cold exterior. If it hits a cold vapor barrier (like a plastic sheet you mistakenly put under your carpet), it turns into water. This water sits on your subfloor. This is why I advocate for systems that manage moisture rather than just trying to block it entirely.
Deep Dive: The Underbelly (The Critical Zone)
The underbelly is the most neglected part of a mobile home. It is dark, cramped, and usually full of spiders. But if you ignore it, you are wasting 30% of your energy budget. This is where the plumbing lives, and this is where the most expensive damage occurs.
Assessing the Belly Wrap
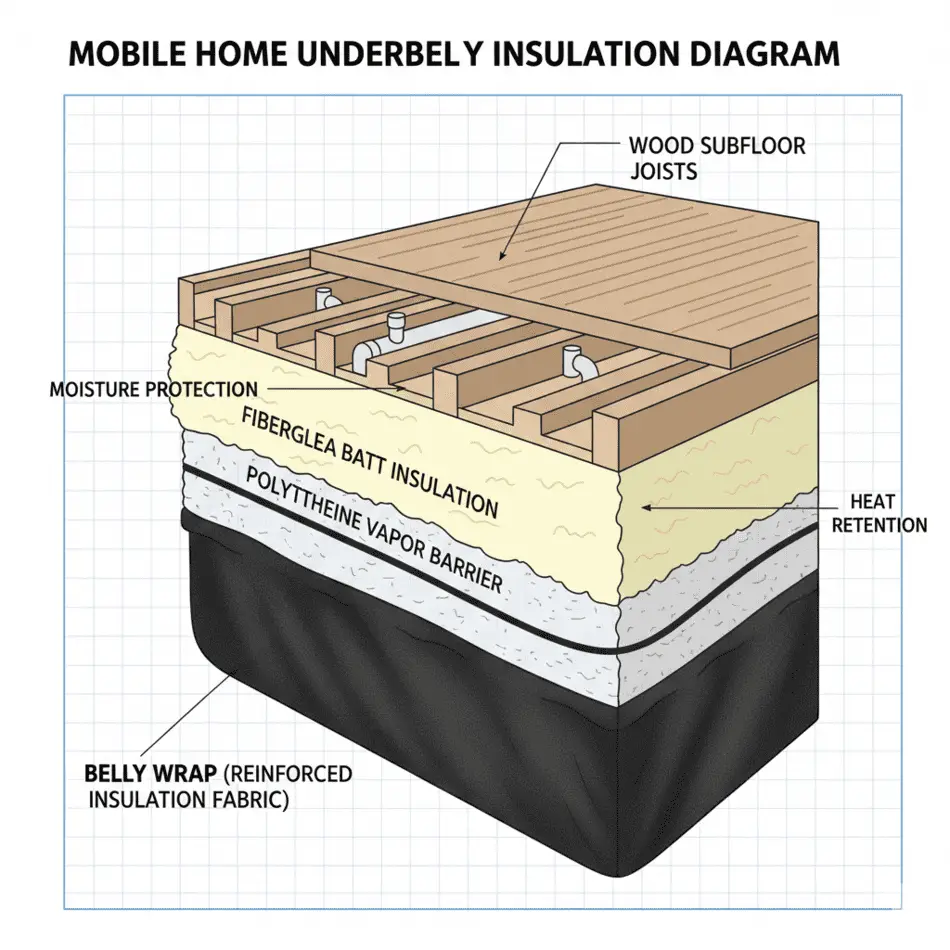
The belly wrap, or bottom board, is the thick polyethylene film that holds your insulation against the floor. Over time, animals or plumbing repairs destroy it. If the wrap is sagging or shredded, the fiberglass insulation inside is likely wet, compressed, or missing. Mobile home floor insulation cannot work if it is compressed. Fiberglass works by trapping air. If it is wet or squashed, the air is gone, and the R-value drops to near zero. In my experience, if more than 25% of the belly wrap is compromised, it is time for a full replacement. We call this “re-bellying.” It involves dropping the old material, removing the sodden insulation, and installing new R-30 batts or blowing in cellulose, followed by a new heavy-duty wrap. We use specialized fasteners to ensure the new wrap does not sag over time.
The Spray Foam Revolution (2026 Standards)
As of 2026, the industry has shifted heavily toward closed-cell spray foam for undercarriages. Why? Because it serves three purposes: it provides a high R-value (roughly R-6.5 per inch), it acts as a vapor barrier, and it physically seals the home against rodents. When we spray the underside of a double-wide, we coat the joists and the subfloor directly. This eliminates the need for a plastic belly wrap and creates an airtight seal that is impenetrable to mice. While the upfront cost is higher, the ROI is found in the lack of future plumbing repairs and the massive reduction in heating costs. Closed-cell foam is rigid. It actually adds a degree of structural rigidity to the floor system, which is a side benefit many homeowners appreciate.
Plumbing and Insulation: The Inseparable Duo
You cannot talk about underbelly insulation without talking about pipes. In a mobile home, the heat tape and the insulation work together. If you insulate the belly but leave the pipes exposed to the cold air inside the crawlspace, they will freeze. I always recommend wrapping pipes in high-density foam sleeves even if the belly is insulated. During a re-belly project, this is the time to inspect your heat tape. If that tape is more than 5 years old, replace it. The cost of a new heat tape is negligible compared to the cost of a flooded home in January.
Deep Dive: Roof and Ceiling Insulation
Heat rises, and in a mobile home, it meets a very thin barrier. Most manufactured home roofs have a “bowstring” truss, leaving a small cavity between the ceiling and the roof deck. This cavity is often barely 6 inches tall at the center and tapers to nothing at the edges.
The Blown-In Technique
You cannot easily install batts in a finished mobile home roof. The solution is blown-in insulation. We access the cavity either by removing the “j-channel” at the edge of the roof or by drilling holes through the roof’s peak. I strictly recommend loose-fill fiberglass for roofs. Never use cellulose in a mobile home roof. Cellulose is ground-up paper: it is heavy and it absorbs moisture like a sponge. Mobile home trusses are lightweight. If you add 12 inches of wet cellulose, you risk a ceiling collapse. Fiberglass is lighter and does not hold water. In 2026, we use specialized blowing machines that can achieve high densities, preventing the insulation from shifting during the high winds often associated with mobile home parks.
The Marriage Line Leak
On double-wide homes, the most significant heat loss in the ceiling happens at the “marriage line”—the place where the two halves of the home meet. Often, the factory-installed gasket fails or was never installed correctly. This creates a direct chimney for heat to escape. During a roof insulation project, we always pull the ridge cap and seal this center seam with a combination of backer rod and spray foam. This single step can save $20 a month in heating costs.
Reflective Roof Coatings
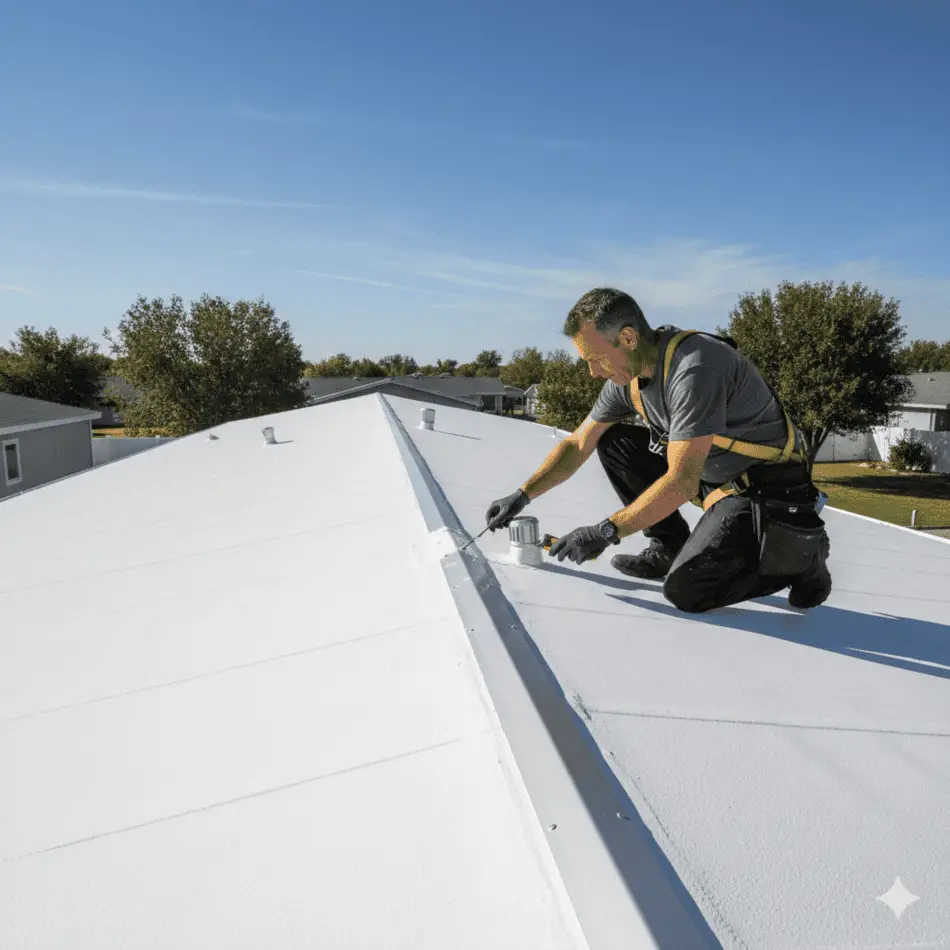
While not technically insulation, a white elastomeric roof coating is a mandatory part of the thermal system for any mobile home roof repair. In 2026, we use high-solids silicone coatings that reflect 85% of solar radiation. This prevents the “oven effect” in the summer. When the sun beats down on a metal roof, the temperature in that small attic cavity can reach 150 degrees. This heat radiates through your ceiling insulation and into your home. By cooling the roof surface, you make the insulation’s job much easier. A silicone coating also provides a seamless waterproof barrier, protecting your new insulation from roof leaks.
Deep Dive: Wall Insulation and the Residing Strategy
Mobile home walls are notoriously thin. If you have an older home with 2×2 wall studs, you only have about 1.5 inches of space for insulation. You cannot get high R-values in that small a gap using traditional fiberglass batts.
Injection Foam: The Retrofit Solution
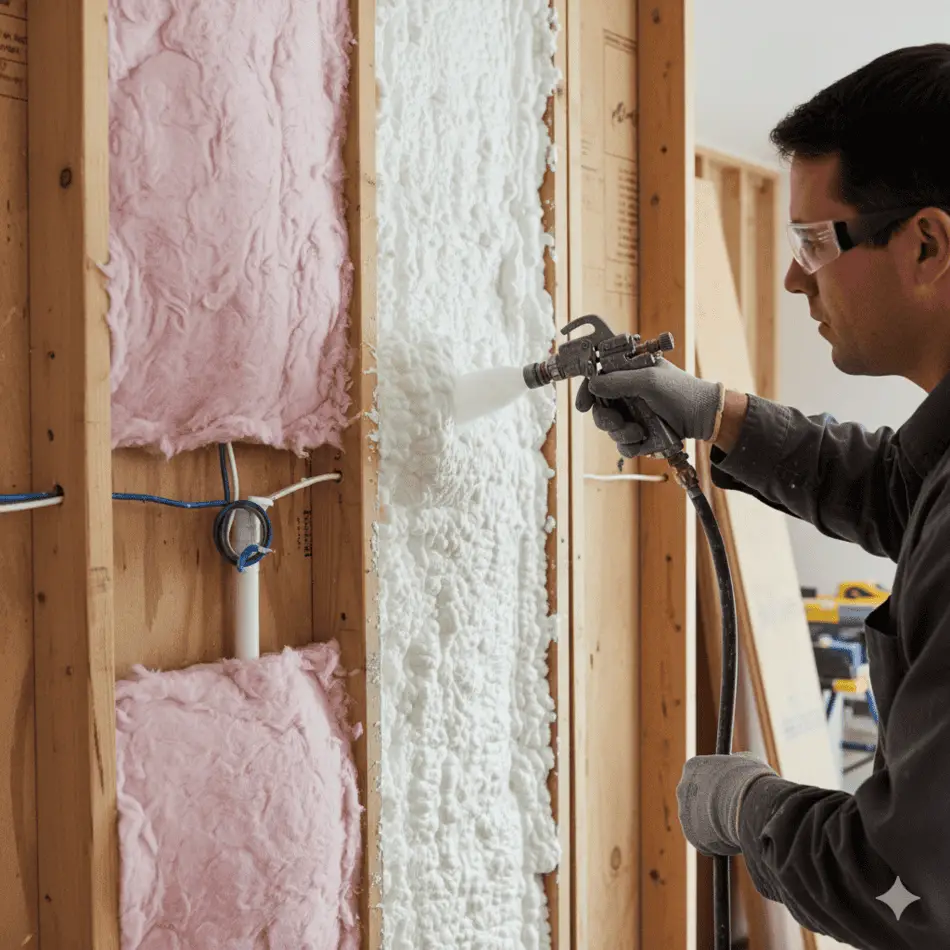
For finished walls where you do not want to remove the interior paneling, we use injection foam. This is different from the canned foam you buy at the hardware store. It is a slow-expanding, water-based foam that has the consistency of shaving cream when it is first injected. A professional crew will remove a strip of your siding, drill small holes into the wall cavities, and pump in the foam. It flows around electrical boxes and wires, filling the entire void. As it cures, it creates a solid block of insulation. This is far superior to blown-in cellulose because it does not settle over time, leaving a 12-inch gap at the top of your walls after five years.
External Rigid Board: The Gold Standard
If you are planning to replace your siding, this is your one chance to do it right. I tell every client: never install new siding without a layer of rigid foam board underneath. We use 1-inch or 2-inch XPS (Extruded Polystyrene) boards. This creates a “thermal break” that stops heat from traveling through the wood studs. It also provides a flat surface for the new siding, which makes the finished job look much more professional. In 2026, we often use foil-faced polyisocyanurate boards because they have the highest R-value per inch (about R-6.5). When you combine injection foam in the cavity with an inch of rigid foam on the outside, you can take a 1970s mobile home wall from R-3 to R-15. That is a game-changer.
Advanced Strategies: Skirting and Perimeter Control
The space under your home is the “plenum” for your floor system. If that space is the same temperature as the outside air, your floor insulation is under constant assault.
Insulated Skirting
Standard vinyl skirting has an R-value of zero. It is just a windbreaker. In 2026, we are seeing a massive shift toward insulated mobile home skirting. These panels have a core of 1-inch or 2-inch EPS foam. By insulating the perimeter of the home, you keep the crawlspace temperature much more stable. In the winter, the ground under your home stays around 50 degrees. If you trap that geothermal heat with insulated skirting, your floor insulation only has to fight a 20-degree difference (70 inside vs 50 under) rather than a 70-degree difference (70 inside vs 0 outside). This drastically reduces the rate of heat loss.
Ground Moisture Barriers
You must have a 6-mil poly vapor barrier on the ground under your home. If you don’t, the earth will constantly release moisture into the crawlspace. This moisture will be absorbed by your floor insulation, destroying its R-value and leading to mold. I don’t care how much insulation you have; if the ground is bare, your home is at risk.
Cost Transparency Table (2026 Estimates)
Prices have reached a new baseline in 2026. These figures represent professional installation for a standard 1,200 sq. ft. home. DIY costs will be roughly 40% of these totals.
| Project Area | Material Type | Average Cost (Professional) | ROI Period (Years) |
|---|---|---|---|
| Underbelly | Closed-Cell Spray Foam | $3,500 – $5,500 | 5 – 7 |
| Underbelly | Fiberglass Batts + New Poly Wrap | $2,000 – $2,800 | 3 – 4 |
| Attic/Roof | Blown-in Fiberglass (R-40) | $1,800 – $2,600 | 2 – 3 |
| Walls | Injection Foam (Tripolymer) | $2,800 – $4,500 | 4 – 6 |
| Windows | Double-Pane Low-E Vinyl | $400 – $700 per unit | 10+ |
Affiliate Products Table
I don’t play around with cheap materials. If you are doing this yourself, use the same tools I give my crews.
| Product Name | Purpose | Why Chuck Recommends It |
|---|---|---|
| Viper-Grip Poly Belly Tape | Belly Wrap Repair | It is engineered to bond to polyethylene. Duct tape will peel off in weeks. This is permanent. |
| FLIR One Edge Pro | Energy Auditing | Stop guessing. This camera identifies the exact stud bays that are missing insulation. |
| Titan 2-Component Foam Kit | Spot Sealing | For sealing rim joists and marriage lines yourself. It provides a commercial-grade seal. |
Actionable Checklist
Follow this logic. Do not move to the roof until the belly is secured.
- Conduct a Thermal Audit: Use a thermal camera or wait for a frosty morning and see where the frost melts first on your roof—that is your heat leak.
- Audit the Underbelly: Crawl the entire length. Look for sagging areas. Use a screwdriver to poke the insulation through any small tears: if it is wet, it must be replaced.
- Seal the Perimeter: Ensure your mobile home skirting is tight. Any wind under the home negates your floor insulation.
- Repair the Belly Wrap: Use belly wrap repair tape on every single puncture. Clean the area with alcohol first or the tape will not stick.
- Verify HVAC Ducts: While the belly is open, check your ductwork. A disconnected duct blowing hot air into the crawlspace is the fastest way to go broke.
- Blow the Roof: Aim for R-40. Ensure the technician uses a baffle to keep the insulation from blocking your soffit vents.
- Install Reflective Coating: Apply a high-solids silicone coating to the roof every 10 years.
Internal Resources
For further technical reading on specific components of your home’s envelope, see my detailed guides on:
- Mobile home skirting options for cold climates.
- Mobile home roof repair and the science of silicone coatings.
- Mobile home floor insulation: A step-by-step re-belly guide.
- Belly wrap repair: How to patch like a pro.
Summary
Insulating a mobile home is a technical challenge that requires an understanding of fluid dynamics and moisture management. You cannot simply throw fiberglass at the problem and expect it to go away. You must address the stack effect by sealing the belly and the roof marriage line. In 2026, we have the materials to make these homes incredibly efficient. My advice is simple: be aggressive with your air sealing and be disciplined with your moisture barriers. If you protect the insulation from water and wind, it will protect you from the cold. A well-insulated home is not just cheaper to run: it is more comfortable, it is quieter, and it is a more valuable asset when you eventually decide to sell. Do it right the first time so you don’t have to crawl under there a second time.
Internal Link Mapping
| Suggested Anchor Text | Topic | Placeholder |
|---|---|---|
| Mobile home skirting | Skirting installation and cold weather tips | Link To Article |
| Mobile home roof repair | Roof maintenance and energy efficient coatings | Link To Article |
| Mobile home floor insulation | Technical guide to re-bellying floors | Link To Article |
| Belly wrap repair | Fixing holes and tears in bottom board | Coming Soon |
Bio: Chuck O’Dell
Chuck O’Dell is the owner of MobileHomeFriend.com and a seasoned real estate investor who has successfully renovated and flipped over 100 manufactured homes across two decades. His philosophy is rooted in first-principles engineering: he ignores the fluff and focuses on the structural and thermal realities of mobile home living. As a recognized expert in manufactured housing systems, Chuck provides direct, actionable advice to help homeowners build equity and reduce operational costs.
Drawing on over 20 years of hands-on experience in the manufactured housing industry, Chuck O’Dell provides proven strategies for sealing and insulating older mobile homes.