Table of Contents
Introduction
If you own a mobile home, there is one device that stands between you and a $10,000 water damage bill. It is not your insurance policy. It is your main water shutoff valve. In my 20 years of investing and flipping over 100 mobile homes, I have walked into too many properties where the floors were soft sponges because a simple $20 valve failed to turn off during a leak.
Replacing this valve is often the very first thing I do when I buy a property. Why? Because the original gate valves installed in the 1980s and 1990s are garbage. They seize up. They break. When a pipe bursts at 2:00 AM, you do not want to be wrestling with a rusted handle.
In this guide, I will walk you through exactly how to replace your main shutoff valve. We are going to focus on upgrading to a ball valve, dealing with mobile home specific plumbing like Polybutylene, and ensuring it does not freeze this winter.
Video Guide Overview
Affiliate Disclosure
I believe in transparency. Some links in this article are affiliate links. If you buy through them, I get a small commission at no extra cost to you. I only recommend products I have actually used on my own flips.
The Short Answer
Do not wait for an emergency. If your current valve is a “gate valve” (it has a round wheel handle), replace it immediately with a “ball valve” (it has a lever handle). A ball valve turns off instantly with a quarter turn and is less likely to seize.
To replace it: Locate the valve (usually near the water heater or outside at the riser), shut off the park or city water supply, cut out the old valve using a pipe cutter, and install a new brass ball valve. For most DIYers, I recommend using Push-to-Connect fittings (like SharkBite) because they work on PEX, Copper, and CPVC, and they do not require expensive crimping tools.
Locating Your Main Shutoff Valve
Before we cut anything, you need to find two things: the house shutoff and the supply shutoff.
1. The Supply Shutoff (The “Street” Valve)
You cannot change the valve inside or under your home unless you kill the water feeding it. If you live in a park, this is usually a valve in the ground (a riser) located in your yard. Sometimes it is shared with a neighbor. If you are on private land, this is at your well pump or the meter box near the street.
Warning: These park valves are often old. If it looks fragile, call the park manager. If you break the park’s valve, you just bought the park a new valve.
2. The House Shutoff
This is the one we are replacing. In mobile homes, this is found in one of three places:
- Inside: Usually near the water heater access panel or under the master bathroom sink.
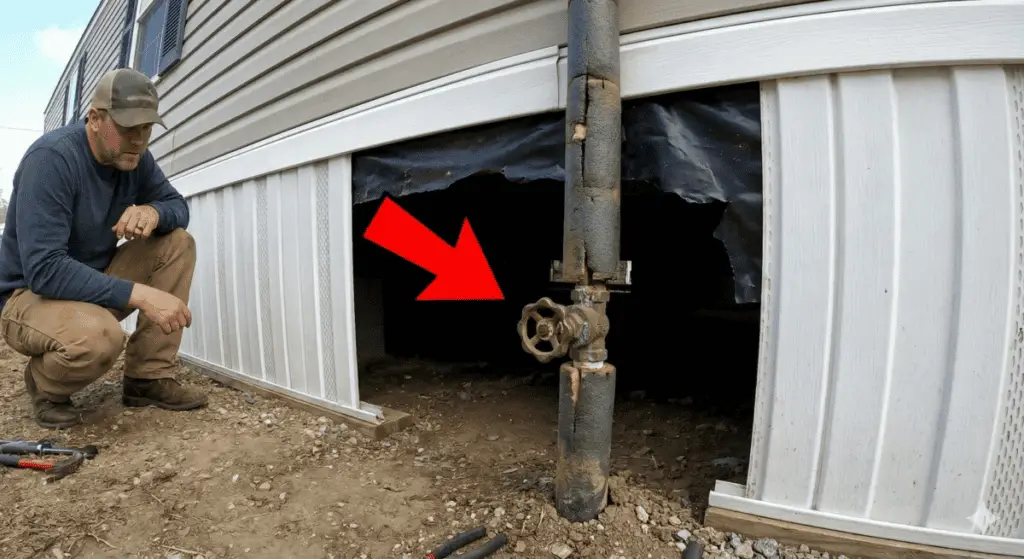
- Underneath: Wrapped in insulation tape near the edge of the skirting.
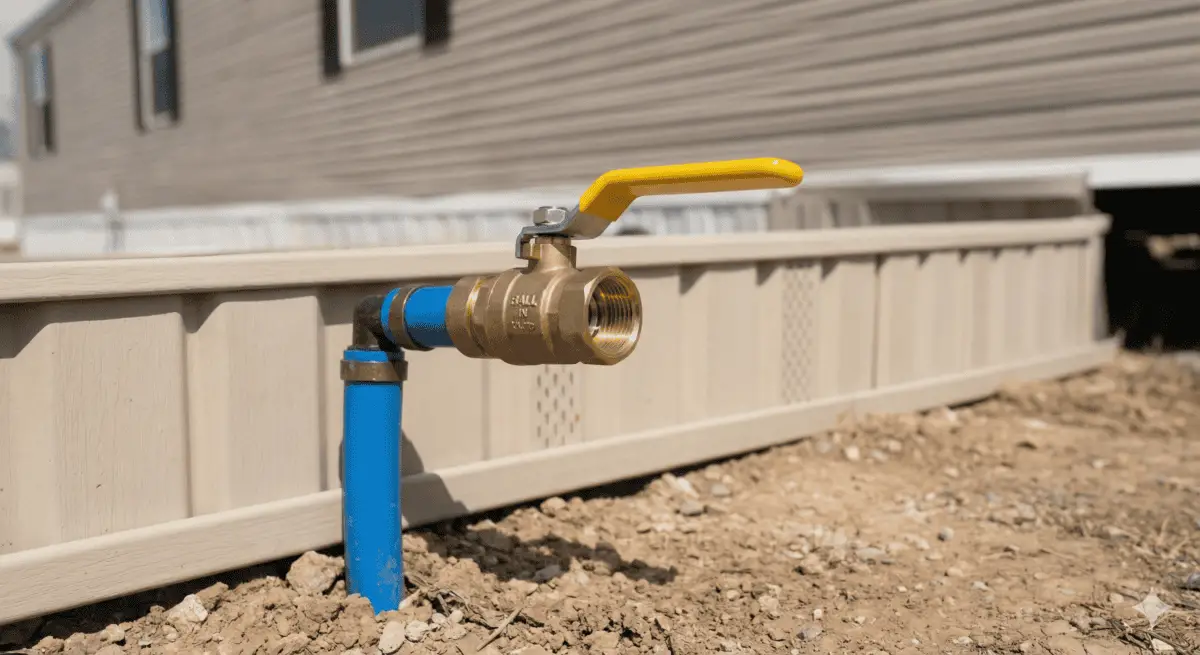
- Outside: On the riser pipe coming out of the ground before it enters the belly wrap.
Understanding Mobile Home Plumbing Types
You cannot buy parts until you identify your pipe. Mobile homes utilize materials that standard stick built houses often avoid.
Polybutylene (The Grey Pipe)
If your home was built between the late 70s and mid 90s, you likely have Polybutylene. It is grey. It is infamous for bursting from the inside out. You cannot use standard PEX fittings on this unless you have a conversion coupling. Standard PEX is slightly different in diameter than Poly pipe.
PEX (The Red, Blue, or White Pipe)
Modern mobile homes use PEX. It is flexible, durable, and easy to work with. If you are lucky, you have this.
CPVC (The Yellowish Cream Pipe)
Rigid plastic. It becomes extremely brittle with age. I hate cutting into old CPVC because the vibration can crack fittings further down the line. Be gentle.
Ball Valves vs. Gate Valves
This is non negotiable. You must install a ball valve.
- Gate Valve (Bad): Has a round wheel. You have to turn it multiple times to open or close it. The internal gate gets stuck or corroded. You turn the wheel, but the water does not stop.
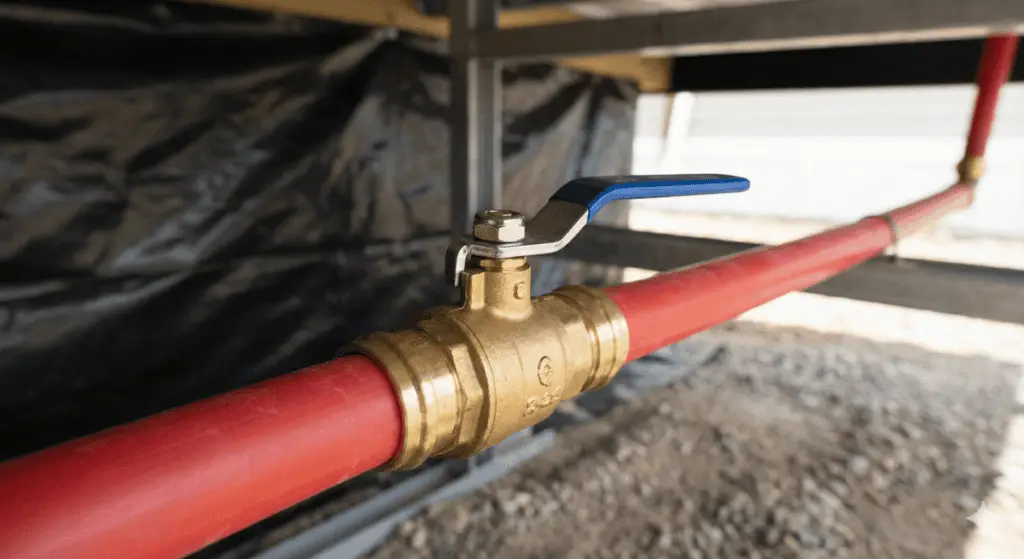
- Ball Valve (Good): Has a lever handle. When the handle is parallel to the pipe, water flows. When it is perpendicular, water stops. It is a stainless steel ball inside. It rarely fails.

Step-by-Step Replacement Guide
Step 1: Preparation
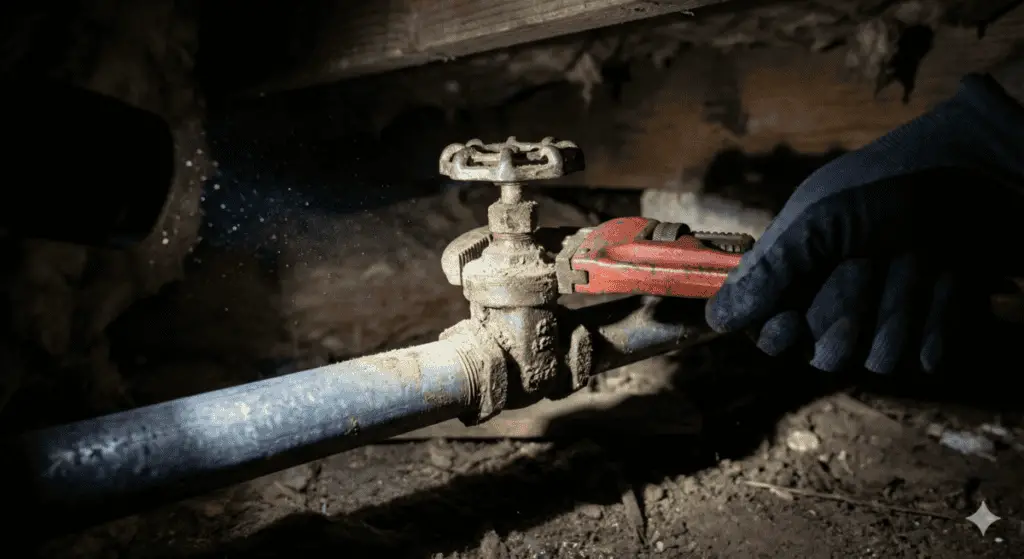
Shut off the water at the street or park riser. Open the faucets in your sinks and tub to drain the pressure. If the valve is under the home, lay down a tarp and bring a bucket. There will still be water in the line.
Step 2: Remove the Old Valve
If you have PEX or Polybutylene, use a PEX cutter (scissor style) to cut the pipe cleanly about two inches away from the old valve on both sides. Make sure the cut is square, not angled.
If you have CPVC or Copper, use a hacksaw or a tube cutter. If using a hacksaw, sand the edges smooth afterwards to remove burrs. Burrs will destroy the O-ring in a push to connect fitting.
Step 3: Install the New Valve
I recommend SharkBite (Push-to-Connect) Ball Valves for this job. They are more expensive than crimp fittings, but they save you from buying a $60 crimp tool for a one time job. They also allow you to rotate the valve handle after installation for easier access.
The Polybutylene Factor: If you are connecting a new PEX valve to an old Grey Poly pipe, you MUST use a transition coupling. One end is marked for Poly (usually grey collar), the other for PEX/Copper/CPVC (tan collar). Do not mix this up.
Push the pipe into the fitting until it clicks and hits the depth stop. Give it a tug to ensure it is seated.
Step 4: Verify and Test
Close your new ball valve (lever perpendicular to pipe). Go turn the water on at the street. Check the new valve for leaks. If it is dry, slowly open the ball valve to let water into the house. Check for leaks again.
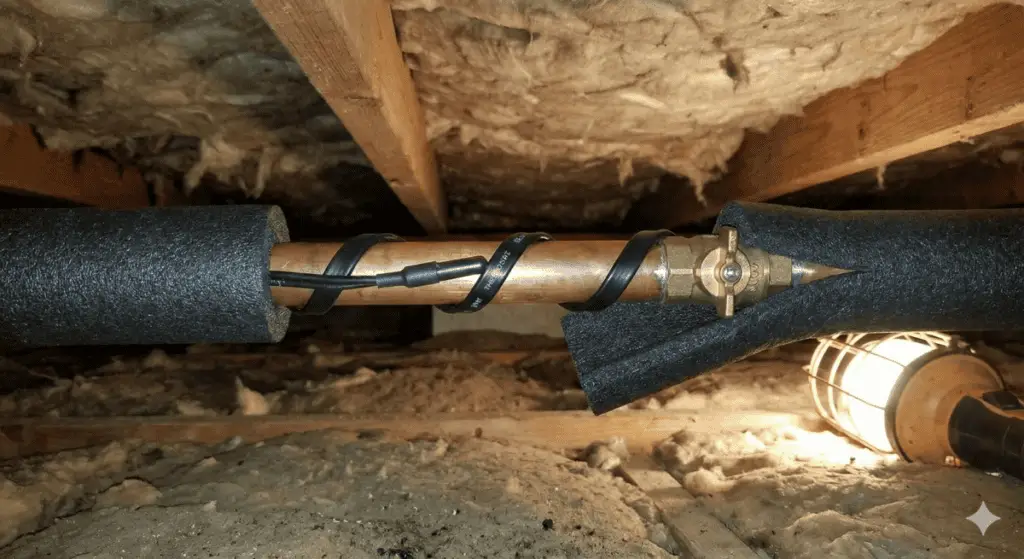
Step 5: Heat Tape and Insulation
If this valve is located underneath the home or outside, you cannot leave it exposed. Wrap the pipe and the valve body (leaving the handle accessible) with fiberglass insulation or foam pipe wrap. If you live in a freeze zone, apply new heat tape directly to the pipe before insulating.
Cost Transparency Table (2026 Estimates)
Here is what you can expect to pay in 2026. Labor rates have risen significantly, making the DIY approach much more attractive.
| Expense Item | DIY Cost | Pro Plumber Cost |
|---|---|---|
| Valve & Fittings | $35 – $50 | $50 – $70 (Markup) |
| Tools (Cutter/Insulation) | $25 – $40 | Included |
| Labor (Trip Charge + Hourly) | $0 | $350 – $550 |
| TOTAL | $60 – $90 | $400 – $620 |
Mobile Home Friend’s Recommended Tools
You do not need a whole plumbing truck. These three items will get the job done right.
| Product | Why I Use It | Link |
|---|---|---|
| SharkBite 3/4 Inch Ball Valve | It is the gold standard for quick repairs. No glue, no soldering, no crimping. If you mess up, you can use a disconnect clip and try again. | Check Price |
| IWISS PEX Pipe Cutter | Do not use a saw on PEX. You need a clean, square cut or the fitting will leak. This tool is cheap and precise. | Check Price |
| Frost King Automatic Electric Heat Cable | Essential for exposed valves under the skirting. It has a built-in thermostat so it only turns on when temps drop. | Check Price |
Actionable Checklist
- [ ] Identify pipe material: Check if it is Grey Poly, Red/Blue PEX, or White CPVC.
- [ ] Identify pipe size: Most mobile home main lines are 3/4 inch, but some older ones are 1/2 inch. Measure diameter.
- [ ] Purchase parts: Get the correct size SharkBite Ball Valve (and conversion couplings if you have Poly).
- [ ] Locate street shutoff: Ensure you can turn off water to the lot.
- [ ] Drain system: Open taps to relieve pressure.
- [ ] Cut and Clean: Cut pipe square; deburr if necessary.
- [ ] Install: Push fittings on until fully seated.
- [ ] Insulate: Apply heat tape if needed and wrap with foam.
Internal Resources
We have more guides to help you tackle your mobile home plumbing:
- How to Replace Polybutylene Pipe in Mobile Homes – A must read if you found grey pipe during this project.
- Winterizing Your Mobile Home Guide – Keep that new valve from freezing when the temperature drops.
- The Truth About Mobile Home Skirting and Ventilation – Proper skirting protects your plumbing.
Summary
Replacing a main water shutoff valve is not about making your home look pretty. It is about control. When a pipe bursts, you need to be able to stop the flow in seconds, not minutes. By spending an hour and less than $100 this weekend, you are buying peace of mind for the next decade. Get under the house, check your valve type, and upgrade to a ball valve before the old gate valve fails you.
About Chuck O’Dell
Chuck O’Dell is a real estate investor and the founder of MobileHomeFriend.com. With over 20 years of experience and more than 100 mobile home flips under his belt, Chuck focuses on practical, high-ROI renovations and maintenance. He believes in doing the job right the first time and teaching homeowners how to protect their investments without breaking the bank.
With over two decades of hands-on experience in mobile home repair, Chuck O’Dell explains exactly why old gate valves fail and how to safely install a modern replacement.
